Basket Liners

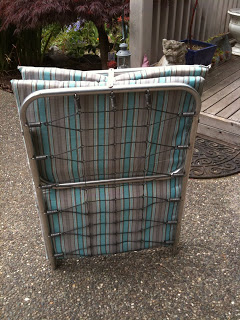
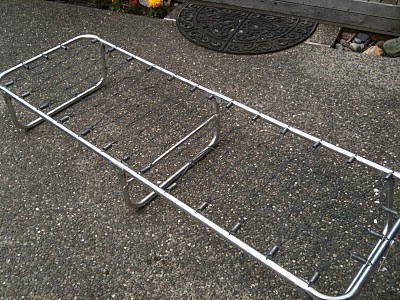
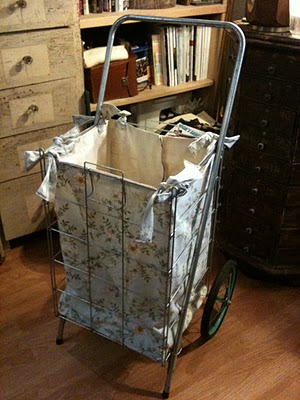
I made some basket liners for my friend Kathy last weekend.  She had this rolling market cart that folds flat and she had a large circular rolling basket that she wanted to use for laundry.  Unfortunately I forgot to take final photos so I only have a few of work in progress.

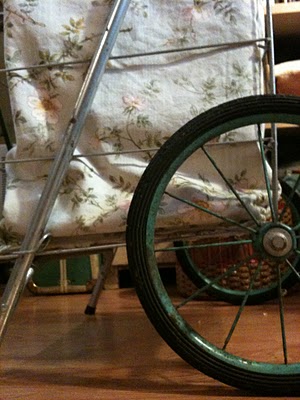
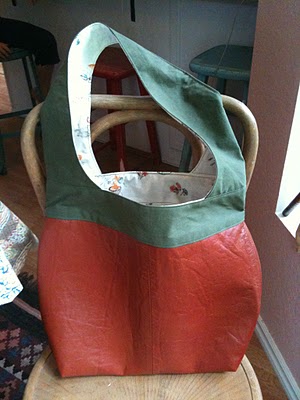
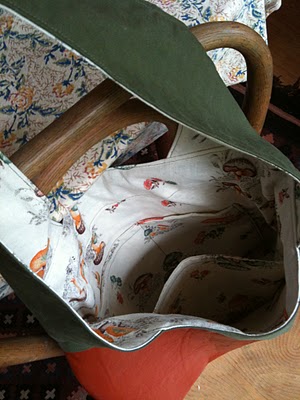
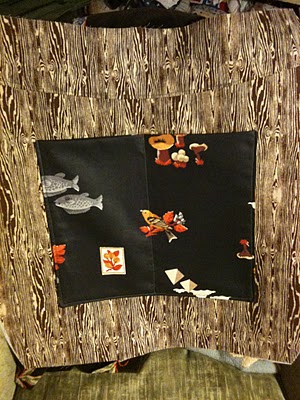
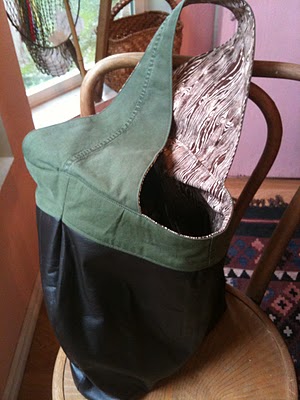
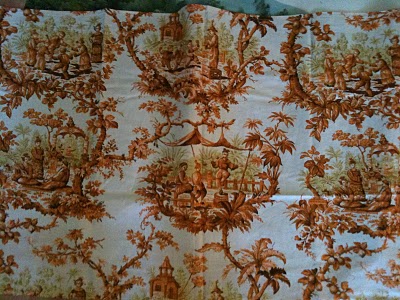
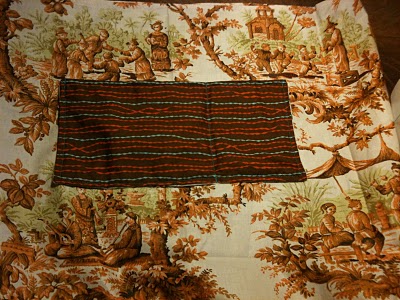
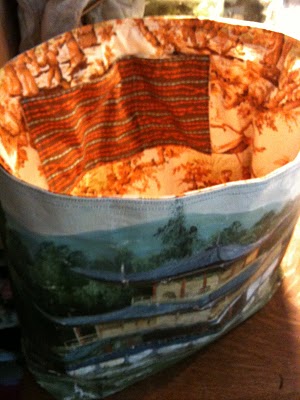
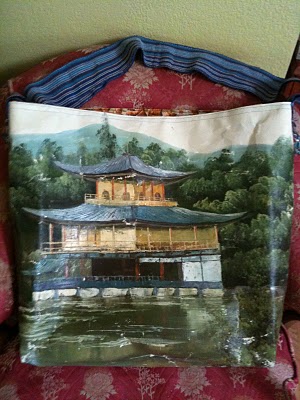
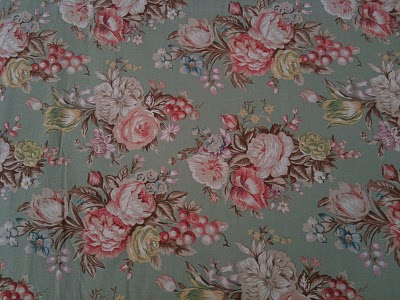
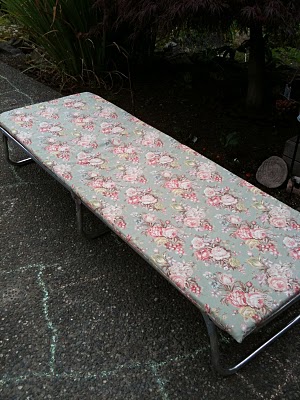
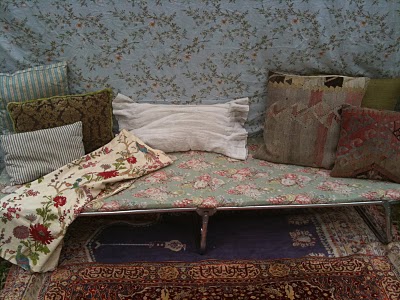
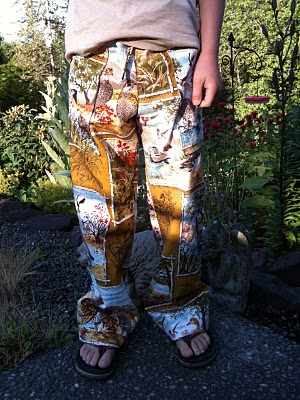
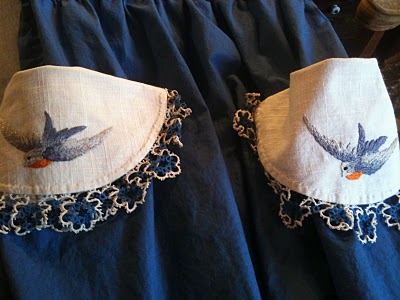
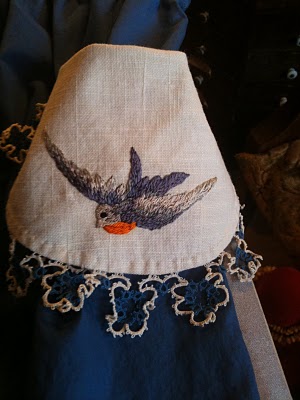
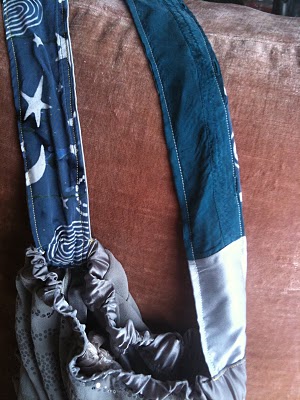
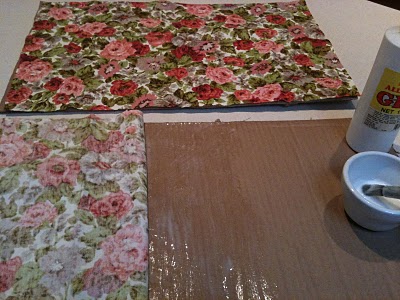
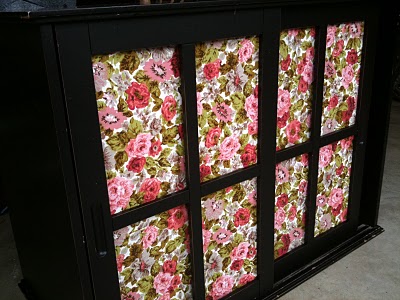
Here you can see the print on the fabric and the awesome green color on the wheel and spokes.  Kathy and I found a queen or king size Ralph Lauren sheet at Goodwill and that's what I used for one side on these liners.  The other side in unbleached muslin.
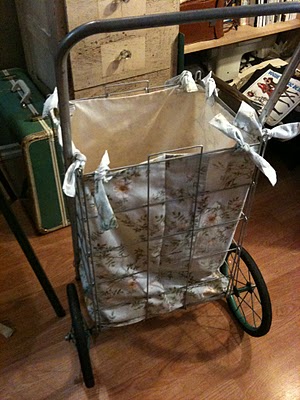
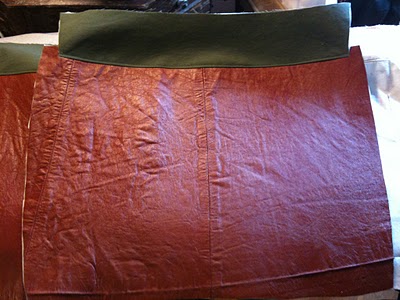
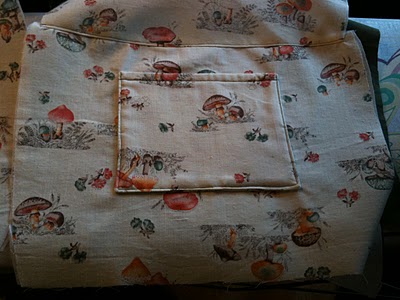
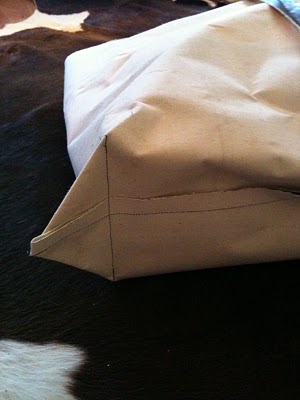
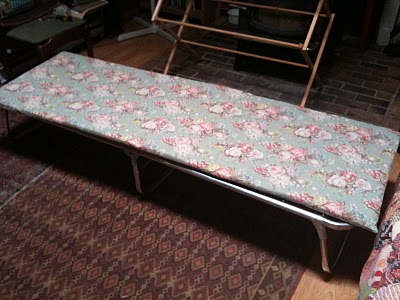
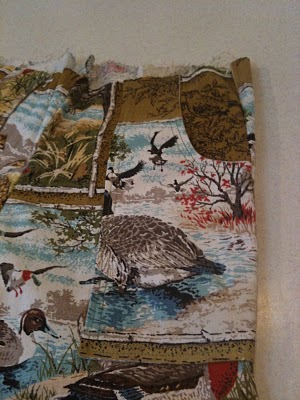
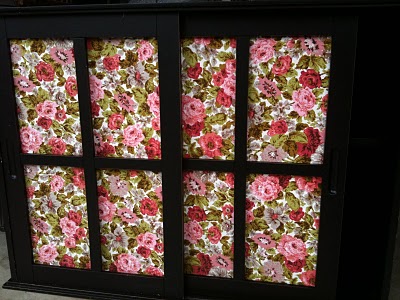
The liners are super easy to make.  You just measure all four sides of your basket and then add in an inch or so for a seam allowance.  You lay it out like a huge rectangle.  Then with right sides together you sew it like your making a pillow case and leaving an opening to turn it right sides out.  You do the same for the bottom piece and then you attach the sides to the bottom.  You can see above how I try to make the seam run down the center back.
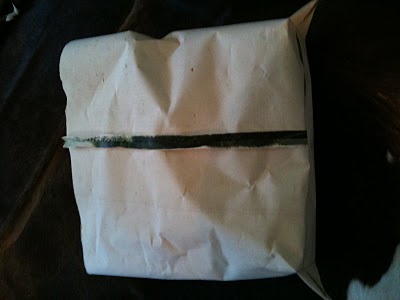
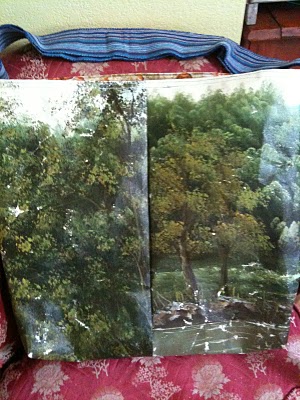
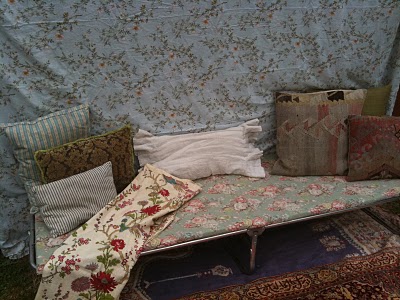
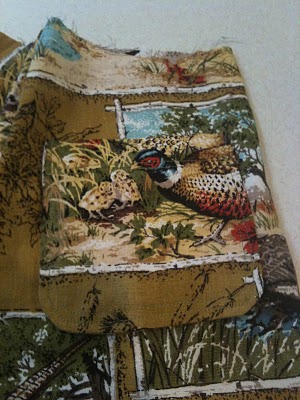
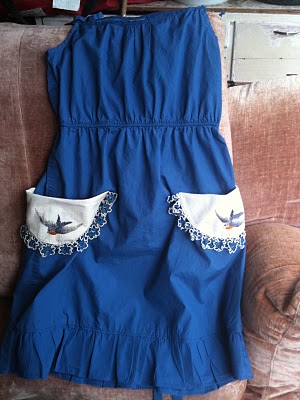
I use sets of ties at the top to hold the liner secure to the top bar of the basket.  On this one I top stitched the ties to the sides of the fabric.  You can either have them pinned in and sewn in the seam or you can top stitch them on after you've turned it right side out.  Either way its cute and it works!

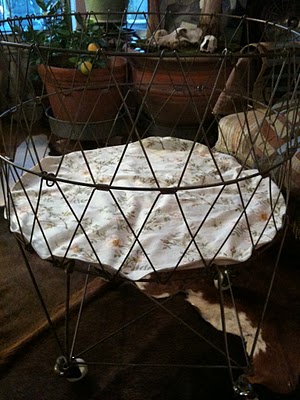
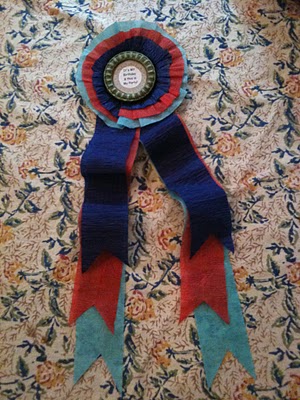
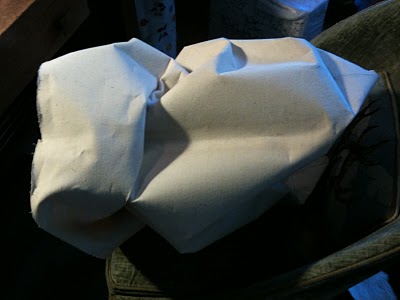
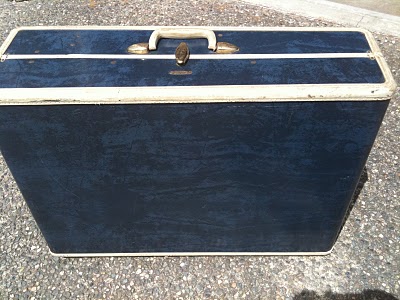
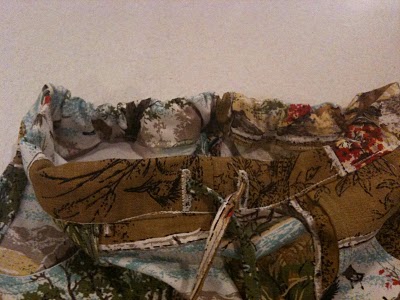
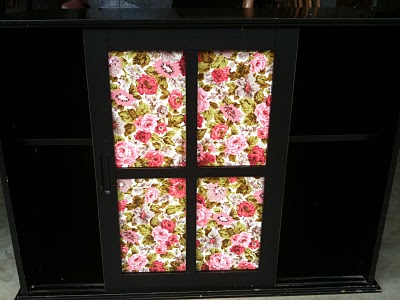
This is the large circular basket that Kathy will use for laundry.  She had originally just wanted it all muslin but I forgot and made one side with the RL sheet.  Here is where you won't see a photo of it complete but you get the idea.  You can see the bottom piece here.  Once I had the super long rectangle of fabric for the side complete I simply pinned it to the bottom circle and sewed it all together.  On this one I did pin in the sets of ties to the seam, sandwiched between the right sides, so when it was turned right side out, the ties were dangling from the top, every 6 inches or so, all the way around.  Easy pie!
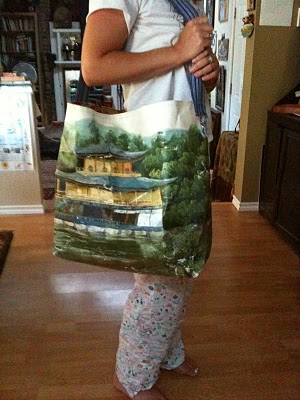
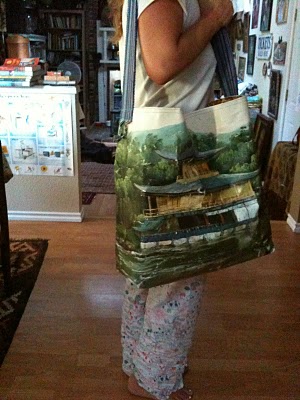
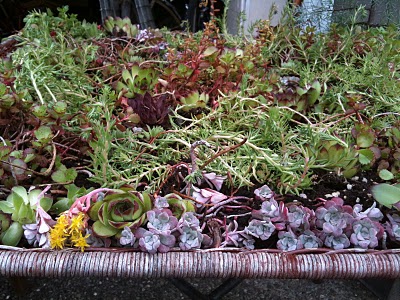
Here is a view of the circular basket from the top.  What's nice is that these liners are reversible.  You can have either side showing, inside or outside.  They are also completely washable, durable and preshrunk so you can get a lot of use out of them.

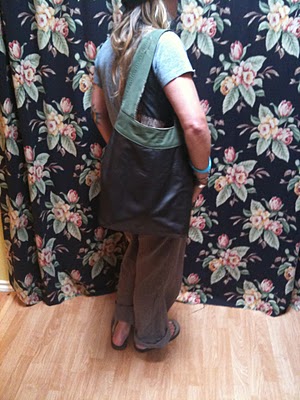
I have several more market baskets I will be making liners for and selling at M&M.  I made a liner for one last spring and it sold the day I brought it in.  A lot of us use the market baskets at antique shows and flea markets to carry all our loot in and help keep our hands free for browsing.  They would also be handy at a park, the zoo, the beach, and at concerts or festivals.

I will let y'all know when I have some for sale.  I am not listing them in my Etsy shop since the pacakaging and shipping is not something I can take on at this time. I really do have at least 10 more market baskets in the basement so do let me know if you want one.  I will take custom orders.  Thanks!

xox
Jennette 

Vintage Altered Halloween Portraits!

Last year at this time we decorated, altered, embellished and otherwise upcycled these cool old vintage photo portraits we had in the basement.  I had been collecting these for a while and had not taken them down to the antique mall yet.  And I had seen a similar project that inspired me to dig these out and get to work!
This was a family art project.  We got out paper, glue sticks, tape, etc. and our creative juices began to flow!  Forgive me now if these are offensive to you.  Just look away!  But this is my families idea of scary.  Boo!

I can't remember who made which one and most were collaborative anyhow.

Most of the colored paper is applied with just a tiny dab of glue stick so it can be removed later, if need be, and it wont damage the portraits anymore than they already are damaged.

We hang these around the house using big vintage paper clip type holders that are hung on a tack.  Or, I have a handful of vintage clipboards that can hang on a tack while the portrait is clipped to the board.

Freaky Baby!
So, be sure to send me a link of your altered photo portraits if you get inspired to make some yourself!  I'd love to see what creativeness people can come up with!  These would be fun to do at other holidays too, like bunny ears at Ostara. 

Make Art, Create, be Creative!

xoxox
Jennette


Glam Witchy Haunted House!

The Glam Witch, in all her glory!

I had an old dollhouse down at the antique mall that had been there for months.  When I did this big reset of my space last week I decided I was done with it there and I was going to turn it into a haunted house.

Here is a photo of the house as I started to tape off the roof.  I liked the dark gray slate color the roof was so I wanted to preserve it.  Everything else I wanted black!

See.  The lite green and red simply wouldn't do for a haunted house!

I am giving you a view from every angle so you can understand how much this needed to become a haunted house!

First coat of spray paint.

Ah ha!  Haunted house base ready for embellishment!

So I found this little doll down at the antique mall and she was $5.  Her eyes are kinda wild and her hair jet black so I just thought she'd make a great little witch.  I remembered that I had that little cupcake topper jack-o-lantern bucket to hang off her arm and I found a tiny key to hang off the other arm.  She ended up with a hand charm necklace as well.  Lucky girl!
I made her the black hat out of construction paper.  I added glitter trim, a silver star and feathers coming out the top.  She is looking real witchy with her hat on! 
Once I had the silver glitter out, it was all over!  In the sense that I wanted to glitter-fy everything!  So I added glitter trim to the house to give it some bling.

I added cheesecloth behind the windows and then glued in long black feathers.  I added really small details that are hard to capture but I will try to show you.  I had some agate beads that are black birds so I glued them above some of the windows.  There is a bat hanging out in the eves, some spiders on the roof, a skull in a heart and limbs hanging in the windows!


The arm and leg charms are little Milagros from Mexico.  They come in handy as spooky elements.

There just happens to be a lamp on behind the house so it gives the windows a nice glow.


"Why you call me Crazy Eyes?!"

Here is a view of the back.  You can see how it all got painted black, wallpaper and all.  If I don't sell this house soon I am going to be tempted to furnish all the rooms!  Yes, I do have miniature vintage doll furniture.  You know I do!

Watch out!  She'll try to get ya!  She has a bucket full of glitter and she isn't afraid to use it!

So that's the haunted house I have been working on.  Upcycled, recycled, and repurposed.  Good as new!  I put a high price on the whole sh-bang for now because I wish I had the room to keep it and don't want to see it leave so fast but I will likely mark it down by next week if its still there.
Not a lot of sewing in the past few days.  Worked on some baby gift items and have a lot of sewing projects planned but it all comes down to the amount of time I have to sew in one day, people.  There just aren't enough hours!
Off to do some pasting,
xox
Jennette


Natasha's Bag and Badge!

This is the bag/sling/tote I made for my girl Natasha, for her Birthday!  Happy Birthday Sweetiepie!

You might recognize this awesome orangey-brown leather from this past project:

Yes!  This was a leather trench coat!  You might remember that I cut out the middle part and made myself a leather and blue velvet bag, retaining the belt loops and button front.  I still had the top half and bottom half left over so I made Natasha's bag using up the bottom half.

I used the same vintage army canvas I gushed about using for my own bag.  And I also used a tweaked version of the same pattern as well.

This is the lining and small inside pocket of the bag.  I used a vintage mushroom fabric.  I ran out of "tree wood grain" fabric so the mushrooms were the next best thing.
(Yesterday I did manage to procure 5+ more yards of the wood grain fabric for future projects.  Thanks Mom!!)

A peek inside the finished bag.

Here is Natasha opening the box that had her bag in it.  See the, "What the heck is in here?" look.  She had no idea I was picking her up to go have dinner with our friends.  She got a few surprises this night!

She looked happy when she realized there was a leather bag in there for her!  I didn't get any photos of her holding it but she seemed to like it. 

Did you notice her Birthday Badge in the photos above?  Here is a better view:

And a close-up:
"It's My Birthday & this is My Party!"

Once again I used a vintage milk cap to form the base of the badge, just like I did here.  I scrunched the crepe paper into a ruffled circle and glued it to the back of the milk cap, added "ribbon" to hang down, sewed a nice pin to a piece of felt and then glued the felt to the back to make it a badge.
You could make a birthday badge out of almost anything.
They are fun and festive and necessary so
make some!

Work continues in the Smashing Rubbish Studios!
I have a few more bags in the works, some different styles,one "carpet bag" made from a vintage rug remnant, and more made from oil paintings.

Working on a "Haunted House,"
xox
Jennette


Wool Pants

The Felted Blanket Wool Pants, first attempt, are Done!

OK, all you nature school friendz.  Here they are!  The first go round of super thick, warm, soft and felted wool pants cut from an old wool blanket that I felted in the washer.  What do ya think?  I wish you could see and feel these in person.  If I played in the woods every week for several hours I would certainly be making myself a pair, stat!
Here they are unhemmed.  Jasper was not so sure about these at first.  They really are SO thick.  But now they are hemmed and he is getting used to what they feel like.  I think they will be superb when worn with his REI undergarments.  To me they are super soft but his sensitive skin may need the long-john barrier.  I left off the pockets for now since the front ones on this pattern require sewing them into the side seems.  I could see no way that my machine would play nice with that much thickness!  I have an old pair of his cargo pants that I may just cut the pockets off of and attach to these.  They would be cotton pockets but I think it would be OK.  Also, I may use a contrasting felted wool piece to make knee patches but I can add these or pockets any time.  For now he just needs a chance to wear them for a day to see how they hold up.  It was so nice on Friday he wore "regular" clothes to Tracks and Tales.

Here is a back view.  I used the thickest felted blanket I had to try to ensure durability.  I have several more blankets but I am thinking they wont felt up as thick as this.  Which makes me wonder if I can make these for other children and have them last.  I was hoping to make and sell some but I would need to feel good about the undestructiveness of the pants!  I have a load of blankets in the wash now so we will see if they felt as thick as this.  This particular blanket has a nice basket weave type of pattern to it as well that seems to add to its strength.

I used a vintage canvas type material for the waistband and draw string.  We'll see how this holds up too.  The drawstrings are attached to elastic that goes across the back but inside the waistband.  And the elastic is stretched a bit and attached to the side seems where it also attaches to the drawstrings.  Does that make sense?  So the elastic can't move around and the drawstrings finish up the job of cinching the pants on tight enough to stay up.  This method works nicely to prevent losing your drawstrings inside your waistband casing.

So the experiments continue!  All the extra length on these just got hemmed up to the inside so I can let the hem out as Jasper continues to become a giant!  And if they last that long.  I was concerned about the hemming because that doubled again the thickness I was trying to sew through.  But it worked!  My machine complained just a tad but with a little finessing it cooperated.
What are you all making, upcycling, or repurposing these days?
Do what you love friendz!  Make art, create, imagine!

Don't Follow your Head, just Follow Your Heart.
xoxox -
Jennette


Best. Bag. Ever.

Well.  I did it again.  I made another bag/sling/purse/tote bag.
And I am freakin in love with it!
You gotta see this.
Look what it started out as:

Yep.  A rich dark chocolate buttery leather mini skirt!
Apparently a size 6 is enough leather to make this bag.

Used my own version of this pattern, based off of this pattern, but with some changes.  Like for instance, I left out the pleats and did not use fusible fleece interfacing on this leather sling.

This is the vintage fabric I used for the inside pockets.  I LOVE it because it has birds, acorns, fish, pyramids, mushrooms and pears!  It's perfectly odd!

I used this amazing wood grain fabric that I found at the Woven Threads quilt shop in Chelan for the lining.  I LOVE this fabric too.  I am going to buy the rest of the bolt and see if my mama will bring it over with her next time she visits.

Here is one side of the soon to be bag.  Notice the seam down the middle.  That's the side seam of the skirt.  And see the crease/fold across the bottom.  That's the bottom hem pulled open. 
Apparently the people who make leather garments use all manner of binding, edging, hem stuff to make the leather behave and act like they want.  I should have taken a photo of all the deitris that came out of the folds and seams of this skirt.  After taking out its lining and pulling apart the seams, the leather was still strong but thin enough to give my sewing machine no complaints.  That's a good thing!

Here is one side with the vintage army canvas band attached.  I am having a major crush lately on vintage army canvas.  I love the earthy hues.  It comes in varying greens and browns.  It's getting harder to find. 

And I am using it to make love, not war!

I happened to find a sleeping bag cover, at a tag sale three weeks ago, for $3!!!  MAJOR SCORE! 
I am on the hunt and look out for more so if anyone out there has any good resources they care to share, please fill me in!
Its durability, texture and color make me happy!

This is the large pocket attached to the lining.  It has a seam running down the center to make two compartments.  And it turns out my stainless steel water bottle fits perfectly on one side while my sunglasses/lip balm case fits perfectly in the other!

Here's another shot of the finished bag.  One thing I like about this bag is that it doesn't really need a closure piece on it.  It doesn't call for a button, zipper or snap.  Because of the handle design, wide at the bottom and thinner on the shoulder,its not easy for anyone but the wearer to get into.  And it wont gap open dramatically, or least you can fold it over, if you have to take it off out in public.
I say best. bag. ever. because I love it so much for me.  It turned out exactly as I envisioned and I plan to wear the heck out of it!  And too, I have actually had several very kind friends and people say they like it too.  And some of them have even asked me to make one for them to buy.  And that is so flattering and sweet and makes me smile.  Since this is not an open source pattern I need to find a similar one that is so I can make them to sell.  Since I set up an Etsy shop I haven't even had time to make, list, sell or ship a single item yet.  Its coming though.  Coming soon.  I can feel it in my bones!
Me + My Bag = True Love

xox
Jennette


Oil Painting Tote Bag


Yep.  It was an oil painting.  Stretched canvas over a wooden frame.  This may not be everyones cup of tea and there may be varying degrees of opinion as to the appropriateness of cutting a painting off a frame and making a tote bag out of it.  But I really took to the idea after I was inspired by this article over at Design*Sponge.
Swarm, run by Leslie Oschmann in Amsterdam, looks amazing. 
I see these great, cheap, interesting, quirky, oil paintings at sales all the time.  They aren't master works but someone did take the time to make them.  When I can get them, especially this size, for $10 or less, I grab them up.  I have a handful more in the works.  I will show them to you as they are made.  I am trying different techniques with each to see what works best and highlights the painting.

Here is the pagoda oil painting after I cut it off the wood frame.  It was large but I decided to use the whole piece.
This is the vintage cotton toile I decided to use for the liner material.  I cut it out the exact same size as the painting.
This is the inside pocket, sewn right to the lining.
Here is the bag almost finished but needing a strap.
I still need to attach some kind of closure.  I am thinking of a magnetic snap on this one.  Then I want to try one with a zipper and then one with a drawstring or ties.
This is the painting, right sides together, side seam sewn up, adjusted so seam goes down the back of the tote, bottom sewn straight across, being turned right side out.
Oh, before turning right side out.
Close up of how I make the bag turn into more of a tall box, by giving it square corners.  You make the liner the exact same way, then attach them together.
I haven't got a close up of the strap but I choose a woven strap in blues.  It was just the right length to double it so I cut it in half to be able to have a tassel at each side and sewed the strap, doubled, to the edge of the bags.  I will try a few different strap methods in the next bags as well to see what works best, lasts, looks best.
Here is the back.  See how the side seams meet in the back.  I used the entire painting making the bag as I did.  And I am reusing the wooden frame the painting was stretched on in another project.
So the tote has already come in really handy for carrying all our towels, snacks, water, etc to the pool and the lake.  It is huge for a tote but it will be good for the library too.
I am testing this one out to see how durable it is and how long the painting lasts when in use like this.  I am now thinking I should have sprayed the painting with some kind of shellac, varnish, or top coat to help preserve the paint and make it more durable.  I need to go see what my options are at the hardware store tomorrow when I pick out paint for the Fireball.  I could spray it now but it may soak through to the liner fabric and be stinky or stain it. 
What do you think?

Off to drop Gus at his first day of work scooping icecream at The Fair,
xo-
Jennette


Vintage Suitcase Dog Bed


Looks like a vintage Samsonite suitcase....

And it was.  A big tall one.  Or extra long, I suppose.  Opens end to end, not on the side.

I forgot to have the family take pictures of me with my safety glasses on and saws-all in hand when I went to town on the hinges of this suitcase to get the two pieces to separate.  Oh well.  You can imagine it, right?!  It was easy work.  No one got hurt!
Here is a picture of what would have been the bottom on the suitcase.  It has all the latches and handles on the sides.  Instead of trying to pry or cut off all the latches, I kept this piece to use in an art project.  It will become a shadow box of sorts..... or more like a modern diorama, filled with interesting objects at varying degrees of depth and distance.  The result ends up being a sort of low-relief three-dimensionality.  But that's a whole 'nother project!!  Back to the repurposed vintage suitcase dog bed!

Here is the top half!  We had two old pillows that were going to the thrift store so instead I just relegated two older flannel pillow case to be the covers and now they belong to Shotzie!

I've been seeing these in magazines lately and online .  All the rage, upcycling suitcases, pampering your pet!  Lots of times the top is left opened and propped back against the wall, and holds doggie objects, like brush, toy, etc.  Or even a photo or piece of art!  Since this one opened end to end, I didn't have the room to leave the bottom on.  Shotzie's bed sits under a full size, old-school free standing chalk board that takes up a lot of space.  You cant really see it here, but it also limits the size and dimension of his dog bed.

Here is shaggy Shotzie, in all his glory, getting comfy in his new bed!  He needs his eyebrows trimmed!  But he loves his bed! 

I may make one more of these, with the top and bottom left intact, to use as a travel bed for him.  I found this particular case back in early summer when Jasper was going to Circus Camp in Georgetown.  Some girls pulled up in front of The Foundry, their car full of vintage cases, trying to sell them to the shop owner.  He didn't want them but my smart friend Natasha suggested that they let us take a look and they did!  They had some cool cases that looked like leather but when we opened one a dust cloud of mold and mildew spores plumed out so big and stinky it was all we could do to close it up and throw it back in the car!  It was gross!  And I deal with a lot of old gross stuff but some of the cases these girls had were nasty!  But not this one.  Not the blue Samsonite.  And it was an unusual size.  Long and tall, opening end to end.  I offered her $10 and it was mine.  You just never know what you'll find on the side of a road!

Off to pick paint colors for Ms. Fireball.
Have a lovely little day,
Jennette

Striped (vintage looking) Pants

Here are the finished Oliver + S striped pants for J.

They were made using the same pattern from this post.  Its the Oliver +S Sandbox Pants Pattern & Starfish Stencil.  This time I layed out the pattern, pinned it and cut it in one sitting. That only took about .5 hours or so.   And then did all the sewing, start to finish, in one evening.  That took about 2.5 hours.  So 3 hours or so all together.  Not bad.  It took a lot less time, this time around, since I had used the pattern once before.  Reusing patterns helps you get faster!

back view

This fabric is not near as hefty as the last fabric I used.  Its a little more flowy.  It was also curtain panels and I have a lot of this material left.  I did the pockets so that the stripes are crosswise.  I like the contrast of the vertical and horizontal lines.  Shows off the pockets a bit.

Jasper loves to model for me,

can't you tell,
he wants to be a star.

Love that boy
and he wears awesome pants!

ttfn,
Jennette


Caught on Cot!


Found this seemingly never used cot at a rummage sale last week. 
I didn't need a cot.
But I bought a cot.
Now I am caught on cots.

Here is the frame unfolded and with the mattress pad off. 
Its in excellent shape.
Looks brand new.

Here is J. modeling the cot for me.
Sweet helper boy.

Why is this something I would buy, you might ask?  I am asking myself too.  And I think it's a couple reasons. 
One: My regular readers know that I have a sickness that requires me to amass as much silvery, metal, galvanized, wiry, metal things as possible.  I don't know what to name this sickness except the crow/raven disease.  Those creatures collect and amass shiny objects like the world might end unless they do so.  That's me, I guess.  I have the crow disease.
Two: Any time I see something, in this case the cot mattress, that I think I can recover or make pretty, I have to do it.  As seen in my ever evolving home.  Things must be aesthetically pleasing.  They must induce joy, wonder, curiosity, and a hip coolness yet timelessness, if I do say so myself.  Aren't these items more lovely to look at?  For me they are.  If something can be beautified, then it must be so.  When I saw this cot I just automatically thought cot/daybed/settee/summer-lounging-place.  SimpleSimon.  So a new cover it had to have.
I had thrifted a Ralph Lauren bed sheet at Goodwill with the intention of using it for my outdoor umbrellas (more on that later)(you know, hipster beautification and all).  Anyhow, it is flowery and shabby chic-ish, and summery, and I though it would make a nice simple cover for the cot mattress.  And it did.
I forgot to take pictures of the process but essentially it's just a huge pillow case.  The back has a three foot long overlap, like on the back of a pillow sham, and you just twist and manipulate the mattress into it until it all smooths out.  Do you know what I mean?  I am trying to think of how else I can explain it.  It starts out as three pieces of material, all the same width, but you cut the back pieces extra long.  Then before you sew it all together you just hem the edges of the back opening, overlap the back pieces to make them line up with your top piece, and sew a big rectangle.  SimpleSimon. 
Looks a little flat and uninviting?  It's actually quite comfortable and relaxing.  A great place to lounge around for the summer.  Check it out...
Don't you want to take a nap?!

Off to sew some leather, Jennette

Vintage Curtain Pants!

Jasper got some new pants!  I sewed this Oliver + S pattern for him using a vintage curtain panel!

Lucky Jasper!  His nice Mama sewed him some new/old pants!  I used the Oliver + S pattern, Sandbox Pants Pattern & Starfish Stencil, bought at Ben Franklin, on sale, many many months ago.  This pattern goes up to size 8, which is great, since he is wearing size 8 in jeans, mostly for the length, since he is a tall 7 year old.    I found after cutting out the pattern that the length sizing was generous so I cut the pattern out on size 8 but folded up the bottom edge to the size 7 and still had more than enough fabric to hem.  Oliver + S rates the sewing difficulty of the patterns by number of scissors images.  They gave this a one scissor out of four, and it was super easy.  I think this pattern will be useful for a long time to come, if he continues to enjoy homemade pants!

I know he is my kid, but how cute is he in these pants?!  Uber Cute! 

This fabric is like heavy cotton canvas, almost.  Not stiff, but definitely with some heft to it.  I will show you some details of the pockets, which I think help them look not so much like pajama pants, but are hard to see in some of these photos.  You could easily make these more like pajama bottoms by leaving the pockets off and using a thinner material.  I think one reason Jasper is so fond of these pants is because people keep telling him they look like really cool camo!  Its a bit hard to tell but they are covered with all kinds of game birds!
These have become the perfect summer pants.  They can be worn with slippers, as seen here, and you can roll them up for a cropped, capri look.  The pants allow plenty of room for stretching, running, tree climbing, forest exploring, fish catching, etc.   They got a lotta give! 
This pattern would totally work for a girl too and I can just imagine them in some of my favorite Heather Ross prints!
Here is a closeup of  a front pocket.  These are fully lined and have double top stitching for an added lil' sumpin, sumpin!  I didn't change anything about the front pockets.  Just followed the pattern directions.
Here is a back pocket, fully lined and double top stitched as well.  I did change the back pocket only in that it did call for a button closure but  I left that out.  Back pocket buttons would just get in the way for my guy.  And be an added unnecessary step for me!
Trying to show you a picture of the casing here.  The elastic in the casing is just across the back, attached at the sides, and then the draw string is used to cinch up the front.  I hadn't used this method before but I am liking how it works.  Yes, those are button holes, and they were very easy to do on my new machine once I got off my lazy bum and tried!  These pants did sit unfinished for a couple weeks because I was not wanting to fuss with button holes.  It was done in less then 5 minutes when I actually just did it!  EasyPeasy! 
Upcycle, repurpose, sew, sew, sew!  I got the bug and I can't shake it!  Must craft, gotta make, will sew for food!  What are you crafting, sewing, knitting, making?  What are you reusing, repurposing, upcycling?  Do tell.  Share, share, share! 
Working on the next pair of pants for J. Vintage stripes!  Will post photos when completed.  It's cut out.  Just gotta sew it!

Off to pick blueberries with The Crafty Aunties,
xox- Jennette

Altered Clothes - take 3, aka Leather Binge

FINALLY finished this leather bag I have been working on forever!  I really like how it turned out and what makes it even ten times cooler is that it is a complete and total upcycle/repurpose project!!  Uh huh!

Here's the dealio.  It was a full size Taiwanese leather trench coat.  I LOVED the color of it at the thrift store but I didn't love the price.   I asked the manager if she could do better on the price and to my utter amazement, she could!  I was actually shocked because it was Goodwill and I have begun to think of them as big corporate mucky muck and I think they usually cost too much.  I am so used to asking for the "best deal," or "is this your best price," or "can you do any better," from all the junkin' I do at yard, flea, estate, rummage sales so it just came out. And she said yes.  And she said how about $10?  Well, I gotta say, I still hesitated since I can find good leather to reuse at all these other types of sales and I never pay more than $5.  I didn't balk long though since I LOVED the color and an idea was starting to formulate.
  
Unfortunately, my photos of the intact and original trench are on the old computer that died but I was able to give you a general idea of what the thing looked like before.  Wow, right?!  I was able to cut out the mid section of the coat, on the seams, and still have the rest to do more projects with. 

I took off the plastic buttons, even though they were cool (saved em, of course), and hand sewed on two antler buttons that I had.  Then I used my machine, which didn't like any of this sewing leather business, to sew the front panel, next to the buttons, closed.

I had some left over deep blue velvet from a wrap around skirt I made myself last winter.  I really like the contrast of the blue velvet and orangey color of the leather.  This bag has a wintery feel to it but I am trying it out for a few days now!  I used the velvet to patch over the pocket openings, line the top edge and as the "belt!"  See the original belt loops, still in place?  The velvet belt slides right thru and cinches the bag closed if need be.  I think I should still add a magnetic snap. 

My machine was so unhappy about sewing leather.  Even though this isn't thick, once you add a layer of velvet, or dare to sew two layers of leather together, she gets pissed!  I went thru a whole package of leather needles and in the end I had to heed my lovely friend Suze's suggestion and take it to a shoe repair place to finish the last step of attaching the shoulder strap.  Thank goodness I did, since now its finished and I can actually use it, kinda the point of making it in the first palce!

I took it to Woodinville Shoe Repair and for $10 (I know, It ups my overall cost and defeats the purpose of bickering over the price in the first place, but it was so nice to just GET IT DONE!), they sewed my straps on for me.  Thank you shoe repair guy!  I think my friends Katie and Dianah both have kick-ass machines that would have don't the job so I will try that next time.  This time i got too impatient!
The shoulder strap is made from the original belt.  It was a thin belt so I just cut it in half, liked that length, and had him sew each piece on, side by side.
Here is the very simple but heavy duty sewing that was done at the shoe repair place.
 
Overall I am very pleased with how this turned out but I am not happy my sewing machine is such a wus.  I think I will have to trade up because I have A LOT of leather projects in mind.  Mostly bags and purses but also saddle bags for my vintage Schwinn, sword and knife sheaths for J. and various gifts and whatnots for friends and family.  I will let y'all know when I have some pieces up for sale :)

So, Sew, Sow!

Dishwasher broken so off to handwash dishes, Jennette


The Owl and the Butterfly

So last week was spent mostly hanging around Georgetown, in Seattle Washington, while J. was at Circus Camp.  Natasha and I had many little adventures and one of a few of them included visiting, and revisiting, Pacific Galleries Antique Mall.  Oh, how I love this mall.  Its like a museum.  Almost every single thing in there is TO DIE FOR but it all has a steep price tag.  If I weren't from this area and was visiting Seattle and stumbled onto this place, I would think I had died and gone to heaven.  It's that kind of place.  Its the place I always look for when I travel.  The place that has ALL THE GOODS!

So it didn't take long for Natasha and I to find many an item to drool over.  On our second trip there we found two of these:
This is a Victorian hair clip.  And this photo does not do it justice.  I don't usually go for gold but this has the most wonderful rich, old patina that makes it just right.  So they came as a set.  there were two of them.  And we both loved them.  So I said lets buy them, each have one, and make them into necklaces.  Friendship necklaces!  Like embroidery floss friendship bracelets, but only better!  We had to think on it for a day or two, they weren't cheap!, and then we had to have them since they wouldn't leave our minds!  I had an idea to attach mine to old watch fob chain, of which I have a lot, to keep it looking vintage and lovely.  I will show you in the next few photos what the back of the "clip" looks like and you will see why we did not want to continue using them as intended, for hair decorations!

You see, the wings of the butterfly are on tiny springs so that the "legs" of the butterfly open when you pinch the wings together and then you stick it to your head and let the wings go, thus closing the feet and attaching it to your hair!  Genius, those Victorians!!  EXCEPT, those feet are pointy and super sharp!  Ouch!  My hair is not nearly as thick and gorgeous as Natasha's and I knew my hair wouldn't take to holding the weight of this little clip in it for long.  Also, we didn't want to chance loosing them if we did try to wear them in our hair and they fell out from not being secured enough.  So necklaces it is!
This is a close-up of the watch fob chain I am currently using to make my necklace.  I love the big over sized spring clasp and the original lobster type clasp.  And it has the perfect old gold patina that the clip has so they look good together but not super matchy-matchy, which I abhor.
Here it is on.  I like how it hangs off to the side a bit so its not too perfect looking.  I simply pinched the wings to open the legs, stuck them thru two links on the chain with one link in between. And voila!  Done!  I have been wearing it around the house and paying attention to whether its staying clasped on like this, just pinched on the chain, as if it were in hair, and so far so good.  It did come off once when I was changing shirts so it must have come unpinched in the switch.  I will figure out a more permanent attachment before I wear it out and about.  I would cry hard if  I lost it!
 
The next little treasure is THE OWL!  Oh, how I adore and treasure this treasure!  As soon as I saw it in the case at PG I had to see what it was and find out how much it cost.  It called to me.  It needed a new home.  I did leave it behind the first day, feeling like I needed to think on it and be certain.  But when we went back to get the clips, it was a done deal.  I couldn't bare to leave without it!
Not the best photo but he is kinda awesome!  It is sterling silver and it's a pin.  It is hollowed out so its not too heavy.  It has some markings on the back that I need to research.  I wanted him to become a necklace too.  His red stone eyes just wont let me be!

Trying to show you the markings.  Its a crown, above a shield/emblem that has F N Co across it, and then it says "trademark" under the shield.  Anyone know what it means or where its from?  Anyhow, I had some silver watch fob chain and the chain and clasp from an old wrist watch so attached these to the sides of the pin back and began making my necklace.

Above you can see the two different types of chain on each side.  What you cant see is the pretty little clasp in the middle of the wrist watch chain or the detail of the watch fob chain and the amethyst and silver piece that originally was on the watch fob and now hangs down the back.  Next photo:

Here you can see the original watch fob piece and the detail of its chain.  It hangs down the back.

There.  Now you can see each side of the chains.  But you cant really tell how wonderful the purple glass in the watch fob piece is.  It is wonderful!

I love my new necklaces and I Love altering, upcycling, and repurposing these beautiful items so they continue to get use and be worn years after they originated. 

Off to pick our raspberries, currants and huckleberries.
xoxox, Jennette


Altered Clothes - take 2

boring blue cotton dress, thrifted in Tucson, blah, blah, blah

I am not even sure why I bought this dress in the first place.  I guess I thought it would be an easy thing to throw over my swimsuit in the summer, even though I have about a hundred an one little cottony summer dresses like this.  ( just as many as the number of purse/bags now!) 
I was about to give it back to the thrift store in my weekly bag-o-thrift-store-crap-to-drop-off when I thought of putting some little front pockets on it.  I realized that my favorite summer dress have some sort of pockets and that I tend to wear them over and over instead of ones without pockets.  This idea led me to my massive and random stack of embroidered thingies: runners, doilies, hankies, aprons, etc from which to choose a pocket material.  It was becoming hard to choose because I have a ton of mediocre type pieces and I was looking for something outstanding.  Then I hit payday.  See below:
1 of 3, using two for the pockets

Tada!  Birds!  I lurve me some birds, I do, I do!  So I found these three linen doily type pieces that have a bird embroidered on them and and edged with some blue and white crochet/tatting/knitting?  Don't know ,but its lovely.  So I folded each one in half and figured out how to place them for pockets.
close-up of pockets

This will be a little difficult to explain but I pinned the right side of the oval shaped doily down first and sewed it to the dress in a half circle shape.  This created the inside of the pocket, or a pocket lining, of sorts.  Then I folded the top of the oval down, over the bottom half circle, wrong sides together now, to create the lovely pocket with bird you see above.  I just top stitched that down, over the first row  and now I have a lined pocket, no cutting involved, and doily is still in perfect shape in case I decide to ditch the dress, it gets ruined, too small, etc.  Thus I will be able to take the doilies off and reuse them.  Smartyparty!
love, love, love
finished altering
Now i just need to wear it!

Upcycle, rework, and try again!  Dance, dance, dance!  Sing, sing, sing!

Altered Clothes - take 1

thrifted strapless top turned into bag

Hello Y'all!  You will have to excuse me for just a moment while I whine, kvetch, and moan about there not being enough time in each day!!  Where do they go, these days of mine?  Monday, where are you?  You were a flash in the pan!  I actually miss you Monday.  I don't want it to be Tuesday, mostly because it means one day less this week to get "stuff" accomplished.  Oh, Tuesday, come on baby, be my day of massive "doing!"  Maybe I can stop sleeping and get it "all done."  There's an idea.  Why hasn't anyone thought of this before?!  Ha!

OK.  Enough of the complaining.  I have actually been trying to train myself lately to focus on the things I accomplish, instead of the things that are still left to do.  It's hard for me.  Being a first born, Capricorn, perfectionist and all.  But I try.  Thus, one reason I blog, is to document and convince myself that I do actually get some things accomplished!  Look!  I have some photos to prove it!  Now I just have to believe it;  That I do get enough done in one day and that the world will not go to pieces if i don't get one more thing made, one more project sewn, one more meal perfect.  Let it go, let it go, let it go....

So I made a few things!  I did get "something" done!  The above photo is of a pretty little strapless silk top I found thrifting.  It looked so sweet but I NEVER do strapless so I just kept looking at it, trying to figure out what it could become.  When all else fails, make a bag!  Like I really need another, when I have a hundred and one already.  I guess I should really consider selling some of these things!

this is what the original top looked like, bottom edge ruffle and all

In the first photo you can see the silk ribbon I used on the inside to make a drawstring type closure.  I have it hanging over the outside edge so you can see it, but it usually stays on the inside.  Since there was already a ruffle around the bottom edge of the top, I just turned it inside out, tucked in the ruffle, and sewed the bottom of the shirt closed.  Then, around the top, where there was a casing with elastic (to hold up the strapless wonder!), I seam ripped two little holes to thread the silk ribbon thru, and then I tidied up the two holes with a few stitches.  So now I can cinch the silk ribbon on the inside to close up the top of the bag.

close-up of the circle print detail and random sequins

For a strap, as you will see below, I used some left over materials.  I personally like things to look a little deconstructed so I like to use a hodgepodge of materials and textures.  I had some left over grey and dark greenish-blue silk and I had an old top that was batiked with lanterns, moons and stars, so I used a combo of these.  One side of the strap is all the batik and one side is random lengths of the silks, including the button placket from the dark greenish-blue.  May be a little hard to see here....
 
detail of strap

I love the prettiness, lightness, and effervescence of this frilly little bag.  It's not usually my style but for dress up it might be nice.  Its not super hardy and durable so I guess it is meant for once in awhile use.  What are you making, altering, upcycling, or crafting these days?  Do tell! 

Make love, do craft, and carry on! 


Black Cabinet Makeover

Revamped Black Cabinet!

Black sliding door cabinet found at tag sale.  Glass from one panel missing. 


Grungy cabinet.  It has a hole in the back, I presume for cords, so you could use this as a media cabinet to hide your whatnots.

When I saw this I thought I could do something with the doors to make it cute and usable.  So I decided to cover some heavy duty cardboard with fabric and use that in place of the missing and broken glass.  It turned out a little shabby chic and I like it.  It's for sale down at M and M and would make a great craft, media, games, art supplies cabinet.  Come check it out if you need some new storage solutions!

Here are some photos of the process of gluing the fabric to the panels to be inserted in place of glass.

The gluing worked really well and made the panels even stiffer.  By using this method, someone could change the  fabric quite easily by covering over existing panels or just creating new panels to attach different fabric to.  Simple, simple.


View of the new and improved black cabinet.

Another view.

With doors slid open to the middle.


Got a project you've been working on?  Do share.

Create, make, do.  Be awesome, pay attention, and keep breathing.

For the Birds

Tiger Birdhouse

I found this wonderful tiger birdhouse over in Eastern Washington this past weekend.  I thought the use of the old lino cut tiger to make the front piece was pure genius!  And it gives it so much character! 
The tiger was created by carving into a large linoleum block.  To get the print you then roll on ink with a brayer. Then you press it to paper to get the image printed.  Love it when people can figure out how to do lino block printing because I have such a hard time thinking in reverse about where you do and don't want color in your print.  My friend Julie does something like this and she is becoming brilliant at it. 


So there was a nest in it!  And the top had two screws holding it on so I knew I could get it out.  Also, I had an idea for the birdhouse the moment I saw it so I will show you what I did with it below.  First the nest:

A birdhouse shaped nest.  It had a lot of colorful feathers in it and twine too.  Who built it?

Here is the nest out of the house, shaped just like the house!  It was very delicate.

Empty birdhouse.  Ready for roof to go back on.  But not before the next step.

Now here is where the project comes in because it involves me using the power tools!  I have had this old wood, stand, tree, perch thingy, forever.  It's lived on the side of our house waiting for something to be done with/to it for years.  I was told it was originally a perch for big birds.  Some of the limbs must have been longer originally.  Oh, I am just remembering, this came from my dad.  One of his many cool finds that he passes along to me, knowing I will eventually come up with some crafty use for it!  Anyways, you can see it here:

Notice the super cool and very heavy base.  Its all rusted now, which I like.

Back view of house on tree stand

Before I put the roof back on I attached the house to the top of the "tree stand."  First I had to get my saw and cut a limb in the front lower and more even so the house could sit on it.  I added an "L bracket" behind that front limb to help keep the house steady.  Then I screwed in little screws in the back so I could "lace" wire over, under, and around them to hold the house tight to a back limb.  I made sure I balanced the house in three places so you can see it resting on a third limb, on the left in this photo.  It seems really solid so I am happy with it!

close up of tiger birdhouse attached to top of tree stand, with roof  :)


Full view.

This is where the birdhouse tree stand lives for now.  Near my front door.  I doubt a bird will be brave enough to nest this low and close to the house but we use our front door so rarely, they might!  You can see our sand dollar spiral from the sand dollars amassed at Westport.  And you can see my metal work owl in this photo too.  More coming on the owl collection, in near future.

What projects have you been doing lately?  What is being created?  Do share!

Make, Do, Create.  Get inspired, be inspiring, and live life to the fullest!

Sedum Table

Ta da!

The sedum-succulent table top is DONE!

The table.  Exactly how I found it.  Do you think it had glass in the middle before?  Hmmmmm......

A different view.

View with chicken wire attached.  Yes, that is chicken wire attached with green twisty ties since I couldn't find the clear plastic zip ties.  Yes, I am resourceful :)  And determined!
Photo with center dowel brace installed.  Find an old dowel that used to be a chicken roost.  Cut the ends at similar angels.  And shove it up and under your first layer of "mesh."  Voila!  Center brace!
Table with second layer of "mesh."  I used "Gutter Gaurd" for this layer since I wanted a smaller weave than the chicken wire.  Both, together, give this structure, heft, and just the right size for water to drip thru but not spanish moss or soil to seep thru.  perfectomundo!

Topped with Spanish moss.
Close up of one corner.  I was trying to show how you can still kinda see the wire mesh mess underneath even though it has a nice thin layer of moss on top.  Key with the moss is to use "just enough," and not too much.  Especially if you are buying it from the hardware store.  Be frugal!
Which layer is this?  Oh yeah!  Like the 4th layer, or so.  Soil on top of Spanish moss, I guess :)
Another view of the finished table just after planting and first watering with organic fish food fertilizer.

View with another newly planted sedum chair, as well. 

Plant, grow, nurture.  Have fun and make art!


Iorek's Birthday Sweatshirt

Iorek's almost finished Birthday Sweatshirt!

Iorek got a black zip up hoody too for his birthday back in April.  His mom, Dianah, just got one for hers too!  Unlike Di's, Ioreks is all hand sewn.  There were so many little tiny pieces that I figured hand sewing would be easiest and it was.  It went super fast once I had all the details cut out.

Work in progress.

I started with a letterpress card that Jasper got for his birthday.  It inspired me to see if I could somewhat duplicate the design idea onto fabric.  This is what I came up with and I am pleased. 

Face details all hand sewn on.

You can see above that I toyed with many ideas about how to do the little details.  I ended up going with non black horns to get more contrast.  Again here, I used wool felt.  Always have, always will.  When it gets washed in hot soapy water it will just all the more bind together and be well held and bound.

Face hand sewn to "mane."

I cut out the mane after I had the face sewn on.  For some reason this made it easier for me.  I guess I forgot to keep taking pictures of the end of the process but you can see by the finished photos of Iorek in his sweatshirt what it turned out like.

Mane hand sewn to horns.

I debated about adding feet.  Something similar to the hands/claws.  In the end I didn't do feet/claws and I like it.  Kinda like he's a monster in his jammies!


"I can make you smile!"

The only thing about hand sewing is that you just gotta be ready to switch colors a lot.  I wanted to match most of my thread to the felt color but you could do a contrast thread color and use it on all of the felt.  If you just get a bunch of needles threaded to begin with then it doesn't seem so daunting to stop and thread a new color each time you need it.

Ready to run the Top Pot Donuts Kids 1K!

The 03 has two functions.  It mimics the sporty gear we see all over the place now so it makes it a bit trendy, if I do dare say so myself.  And, it is Iorek and Jasper and our friend Rowan's birth year.  I am working on Jasper and Rowan's sweatshirts now.  They will be "monsters" too, similar, but different, and all with the 03 on the other side.  They plan to be a little gang of seven year old monsters!  They already are that gang, little monsters, but now they have uniforms!


Jasper and Iorek cracking up.

I adore these two kiddos.  This is how they are when they are together.  Laughing, giggling, smiling, bossing, singing, making music, doing magic shows, investigating, exploring, reading, explaining, spazzing, tumbling, negotiating, bickering, loving and still laughing.  We adore you Iorek!  Thanks for being Jasper's good, good, buddy!  You are an official 7 year old monster gang member!  Congratulations!

Rib Cage Love


Dianah's rib cage sweatshirt

Way back in January, I guess it was, according to Dianah, she herself told me about this great sweatshirt she had seen in a local shop here in Seattle.  She wanted it SO BAD but couldn't afford the over $100 price tag.  Of course we LOVE to support our local hand-makers but there just wasn't room in her budget for a new $100 plus sweatshirt. 

enlarged stencil found on Internet

So she is telling me about it, on and on, I love it, I love it, I love it, and I am just thinking, the whole time, I will just make you one for your birthday.  How hard could it be?  I did finally, a few months later, make my way to see THE actual sweatshirt and low and behold, I KNEW I could duplicate it, make something very similar, but with my little touches and have it be close enough that it would still be the sweatshirt Di had been coveting.  Also, it wouldn't cost me nearly $100 to make!

stencil cut out and layed out

So as Dianah's birthday was approaching I was making my way toward the final design and implementation of said design onto a great, almost new, but totally second hand, thrifted black zip-up hoody sweatshirt.  The sweatshirt was the only one little tricky piece to this operation.  I knew if I looked long and hard enough I could find a great one used and not have to buy a brand new one.  It was just a matter of staying on the hunt!  The sweatshirt was located at one of the many fantastic thrift stores in Tucson, Arizona!  When we were there in April I still hadn't found the ideal zip hoody but since I was thrifting my toosh off every day I finally scored the perfect one!

some wool felt pieces cut out and layed out

  In the photos you will see some the steps it took me to get to the final stage: Di loving it and wearing it every. single. day.  Once I had it finished and could see for myself how well it turned out, I just could not wait to give it to her.  It was killing me to not talk about it to her and just give it to her as soon as I was done.  When she did finally open her gift I was jumping up and down like a child and clapping my hands!  What a goof ball!  But it was perfect because we were having a fire in our "tiny" backyard pit and she was cold and needed a hoody to be warm so I tore into the house, grabbed the gift bag, and shoved it in her hands.  "Open, open, open," I demanded!  She was thrilled!  Smiles all around!

pinning in progress

So besides locating the sweatshirt, I had a few other items to attend to.  I had to find a stencil to suit me.  Also, I knew I was adding the little hear under the ribs because that was big part of what Di liked about the original hoody, but thankfully I know how to make hearts so that was an easy step!  The search online for rib cage stencils didn't take long and I was able to enlarge it on my printer/scanner to get the size I wanted.  I only needed to cut out one side of the cage to make the entire thing because each side was the exact same.  Go figure!  The sternum part was a big guessing game because I could not remember if the "original" had one but after much debate between Chad and I, we both decided it looked cool, splitting the one in the stencil, down the middle, and having the zipper go up through the middle of it. 

 
close up of pinning. 

I didn't have any white wool felt on hand so I got that at Ben Franklin.  I got the red there too but a few months back when I was working on Iorek's birthday sweatshirt.  Iorek is Dianah's son and Jasper's real good friend.  I will do a post of his sweatshirt soon!  Anyhow, besides the felt I just needed a million tons of pins!  Some of you know that when I sew, I usually don't use pins at all, or very little.  But for a project like this, you will lose your mind if you try to go pinless!  I knew for best results I would need to pin the heck out of it, get lots of pokes, and I would end up with the perfect finished product! 


the entire thing PINNED!

So then it was time to sew!  I just picked a place and started!  What else can you do?!  I just made sure my sewing machine was loaded with good white thread and began.  As I got one rib done, I would take the pins out and cut the loose threads so I could begin to see what it would look like.  I got into a rhythm and just blissed out on it.  Zen sewing, if you will.  It is thrilling to have a project come together so easily and be able to see your progress so quickly.  It empowers you.  I felt like Super Sewer Girl Super Hero with no seam ripping being my Super Power!

almost finished!  label applied.  heart hand sewing left to do.

I did finish with inserting one of my own home made labels.  And I knew I was going to finish the heart by hand sewing the edges, in between the ribs.  Once that was all done, it was ready to go.  I was so excited by how it turned out!  Very pleased!


close up of hand stitching on heart.

You can see the machine stitching on the ribs in the picture above.  Some places I got too close to the edge and didn't want to chance it not being well attached so I just went back over those spots and restitched inside, more on the rib.  I did not seam rip the original stitching, in those cases, I just left them double stitched and I really like how it gives it more character and makes it look really handmade. 
And oh,  I always use wool felt too, never acrylic.  Not only is the wool natural fiber and much preferred, it will also begin to bind to the sweatshirt each time it is washed.  Oh the wonder of wool!


Dianah in her sweatshirt!!!

Make a gift, give it with love, and be happy!

Create, Upcycle, Reuse, and Make!