(Last) Friday Finds

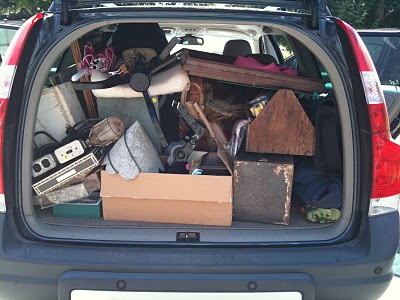
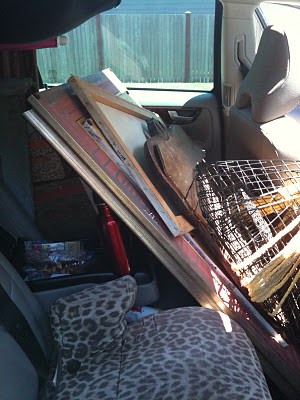
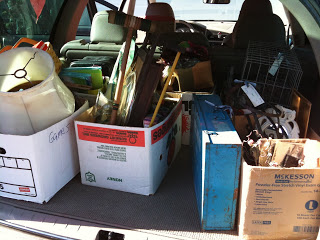
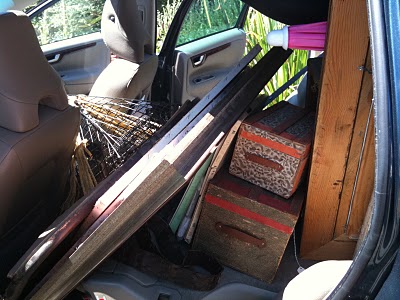
Here are a few things I have found in the last few days:

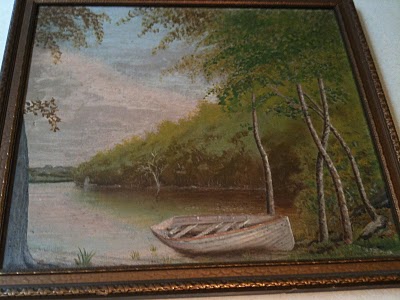
Vintage Oil Painting in Antique Frame

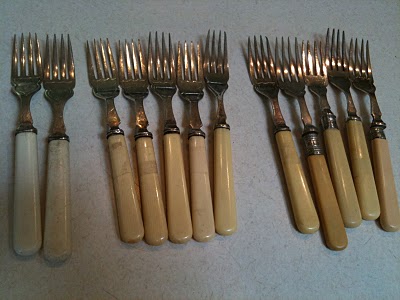
A Mismatched Set of French Ivory Forks for the Fireball


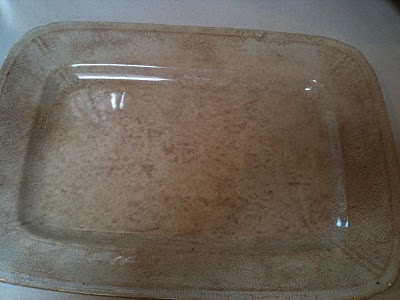
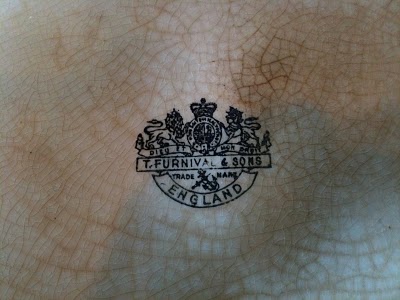
Large English Ironstone Platter.  Love the Crazing!

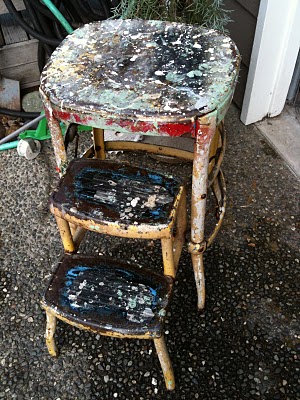
Perfectly Paint Splattered Steppin' Stool

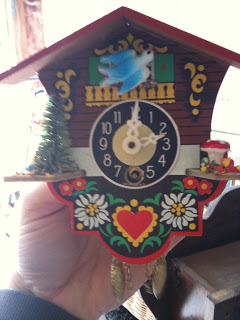
A tiny German Cuckoo Clock for the Fireball

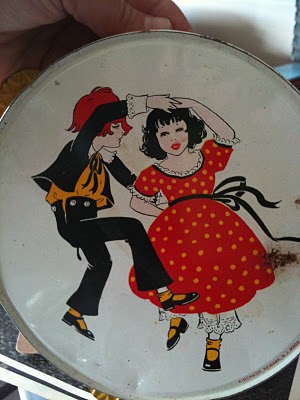
A Vintage Tambourine

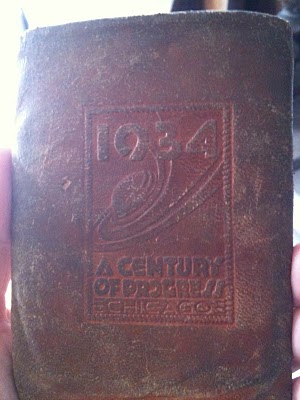
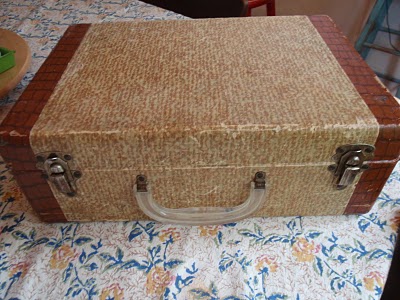
A Vintage Leather Wallet from the 1934 World's Fair

A Vintage Butterfly Napkin Holder for the Fireball
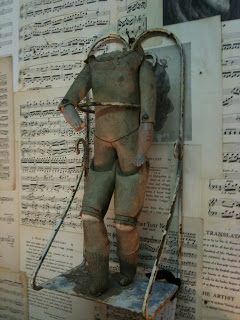
A Neat Old Photo
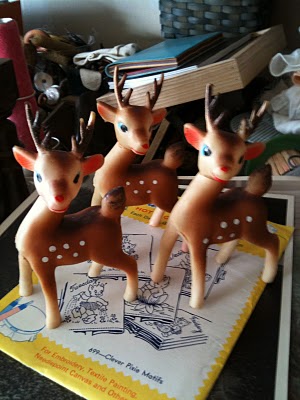
Three Holiday Reindeer

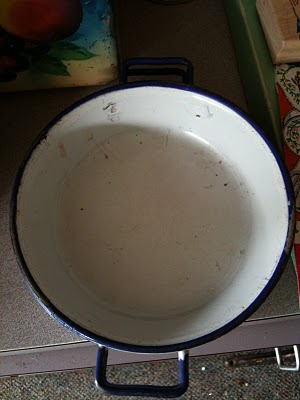
Two Swedish Enamel Dishes for the Fireball
Vintage Felt Snowman

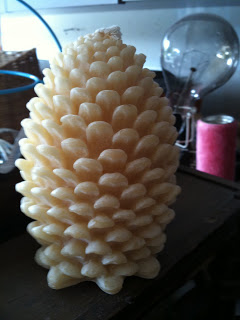
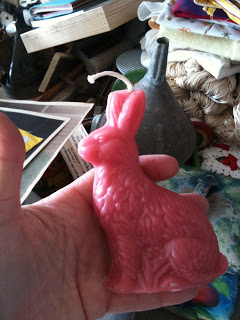
Two Different Beeswax Candles.  Pinecone and Bunny

Transferware Egg Shaped Dish.  Lovely
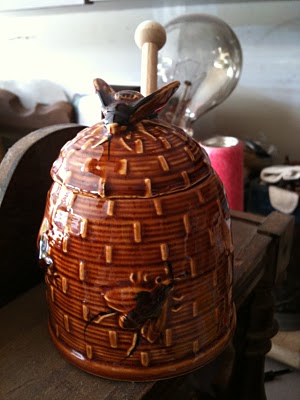
Honey Pot

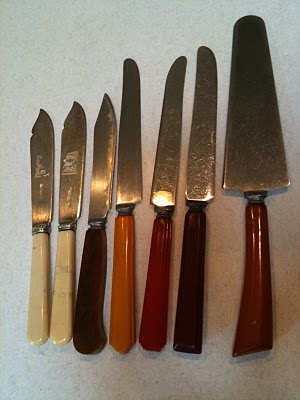
Bakelite and French Ivory Handled Knives and Server
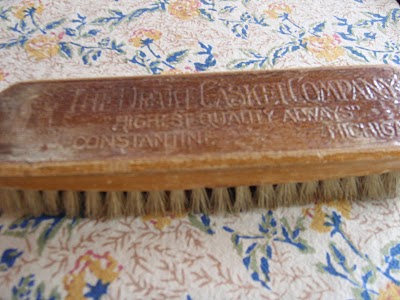
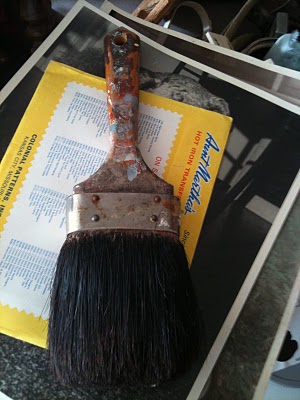
Old Painty Brush

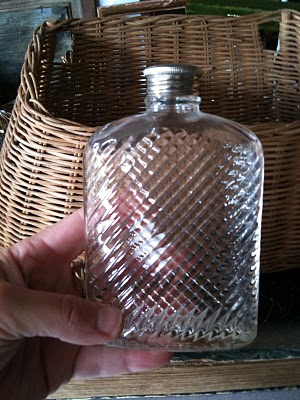
And a Glass Flask.  Very Important!

So that's a few of the items now lingering in my garage.  I have such a massive load of items to price and get down to M&M.  I will post a quick note when I take new items there and try to show pictures too. 
I did get my ETSY account initiated but I have a lot of tweaking, finishing and learning to do before you see items listed there for sale.  I will definatley publish a big grand opening post when it is up, running, and filled with items to purchase.  Hopefully this will happen in the next few weeks.  But until then I will continue to buy and make great stuff and you'll see it there soon. 
I also hope to get some regular features going on here at Smashing Rubbish.  Friday Finds will become a show and tell of new items bought or found during the past week.  I will continue to share crafts, repurposed and upcycled projects, art work, sewing projects and the like, as well.
Thanks to those of you who leave comments and feedback!  I appreciate it and I love reading what you say!  The only way I know to respond right now though is to post a comment back in the same post so check back if you are waiting on a response from me.

Off to finish getting my pickles lacto-fermented! 

Jennette's Kick-Ass Southwest Monroe Bucket Cukes
coming right up!

xox - Jennette


When I Shop

When I go shopping for, well, everything, the back of my car ends up looking like this.

And the seat next to Jasper looks like this.

When I sort through all that stuff I bought at tag sales, thrift stores, flea markets, estate sales, auctions, etc., and after I get most of it priced, the back of my car looks like this when I am getting ready to take it to the antique mall where I have my space.  Bye bye goodies, hello paycheck!

Jasper is such a sport about being crowded in with all my good junk. 

This is one view of what my space at the mall looks like.  Stuffed full of vintage treasures!

Come take a peek if you are in need of some bad-ass, uber cool, stylin', good junk!  All our vendors have unique and interesting items and our inventory changes daily.  My hope is that by late fall I will also have an Etsy sight up and running so I can have another outlet for my smaller items and the few things I make.  I will keep you posted but until then, come visit M&M Antiques and Collectibles at 119 W Main St., Monroe, WA.  98272. 360.794.7660

Gotta go unpack from our whirlwind last two weeks of visiting Westport, Chelan and Lopez Island,
Whew!  Wish me luck!
Jennette


Striped (vintage looking) Pants

Here are the finished Oliver + S striped pants for J.

They were made using the same pattern from this post.  Its the Oliver +S Sandbox Pants Pattern & Starfish Stencil.  This time I layed out the pattern, pinned it and cut it in one sitting. That only took about .5 hours or so.   And then did all the sewing, start to finish, in one evening.  That took about 2.5 hours.  So 3 hours or so all together.  Not bad.  It took a lot less time, this time around, since I had used the pattern once before.  Reusing patterns helps you get faster!

back view

This fabric is not near as hefty as the last fabric I used.  Its a little more flowy.  It was also curtain panels and I have a lot of this material left.  I did the pockets so that the stripes are crosswise.  I like the contrast of the vertical and horizontal lines.  Shows off the pockets a bit.

Jasper loves to model for me,

can't you tell,
he wants to be a star.

Love that boy
and he wears awesome pants!

ttfn,
Jennette


Caught on Cot!


Found this seemingly never used cot at a rummage sale last week. 
I didn't need a cot.
But I bought a cot.
Now I am caught on cots.

Here is the frame unfolded and with the mattress pad off. 
Its in excellent shape.
Looks brand new.

Here is J. modeling the cot for me.
Sweet helper boy.

Why is this something I would buy, you might ask?  I am asking myself too.  And I think it's a couple reasons. 
One: My regular readers know that I have a sickness that requires me to amass as much silvery, metal, galvanized, wiry, metal things as possible.  I don't know what to name this sickness except the crow/raven disease.  Those creatures collect and amass shiny objects like the world might end unless they do so.  That's me, I guess.  I have the crow disease.
Two: Any time I see something, in this case the cot mattress, that I think I can recover or make pretty, I have to do it.  As seen in my ever evolving home.  Things must be aesthetically pleasing.  They must induce joy, wonder, curiosity, and a hip coolness yet timelessness, if I do say so myself.  Aren't these items more lovely to look at?  For me they are.  If something can be beautified, then it must be so.  When I saw this cot I just automatically thought cot/daybed/settee/summer-lounging-place.  SimpleSimon.  So a new cover it had to have.
I had thrifted a Ralph Lauren bed sheet at Goodwill with the intention of using it for my outdoor umbrellas (more on that later)(you know, hipster beautification and all).  Anyhow, it is flowery and shabby chic-ish, and summery, and I though it would make a nice simple cover for the cot mattress.  And it did.
I forgot to take pictures of the process but essentially it's just a huge pillow case.  The back has a three foot long overlap, like on the back of a pillow sham, and you just twist and manipulate the mattress into it until it all smooths out.  Do you know what I mean?  I am trying to think of how else I can explain it.  It starts out as three pieces of material, all the same width, but you cut the back pieces extra long.  Then before you sew it all together you just hem the edges of the back opening, overlap the back pieces to make them line up with your top piece, and sew a big rectangle.  SimpleSimon. 
Looks a little flat and uninviting?  It's actually quite comfortable and relaxing.  A great place to lounge around for the summer.  Check it out...
Don't you want to take a nap?!

Off to sew some leather, Jennette

Vintage Curtain Pants!

Jasper got some new pants!  I sewed this Oliver + S pattern for him using a vintage curtain panel!

Lucky Jasper!  His nice Mama sewed him some new/old pants!  I used the Oliver + S pattern, Sandbox Pants Pattern & Starfish Stencil, bought at Ben Franklin, on sale, many many months ago.  This pattern goes up to size 8, which is great, since he is wearing size 8 in jeans, mostly for the length, since he is a tall 7 year old.    I found after cutting out the pattern that the length sizing was generous so I cut the pattern out on size 8 but folded up the bottom edge to the size 7 and still had more than enough fabric to hem.  Oliver + S rates the sewing difficulty of the patterns by number of scissors images.  They gave this a one scissor out of four, and it was super easy.  I think this pattern will be useful for a long time to come, if he continues to enjoy homemade pants!

I know he is my kid, but how cute is he in these pants?!  Uber Cute! 

This fabric is like heavy cotton canvas, almost.  Not stiff, but definitely with some heft to it.  I will show you some details of the pockets, which I think help them look not so much like pajama pants, but are hard to see in some of these photos.  You could easily make these more like pajama bottoms by leaving the pockets off and using a thinner material.  I think one reason Jasper is so fond of these pants is because people keep telling him they look like really cool camo!  Its a bit hard to tell but they are covered with all kinds of game birds!
These have become the perfect summer pants.  They can be worn with slippers, as seen here, and you can roll them up for a cropped, capri look.  The pants allow plenty of room for stretching, running, tree climbing, forest exploring, fish catching, etc.   They got a lotta give! 
This pattern would totally work for a girl too and I can just imagine them in some of my favorite Heather Ross prints!
Here is a closeup of  a front pocket.  These are fully lined and have double top stitching for an added lil' sumpin, sumpin!  I didn't change anything about the front pockets.  Just followed the pattern directions.
Here is a back pocket, fully lined and double top stitched as well.  I did change the back pocket only in that it did call for a button closure but  I left that out.  Back pocket buttons would just get in the way for my guy.  And be an added unnecessary step for me!
Trying to show you a picture of the casing here.  The elastic in the casing is just across the back, attached at the sides, and then the draw string is used to cinch up the front.  I hadn't used this method before but I am liking how it works.  Yes, those are button holes, and they were very easy to do on my new machine once I got off my lazy bum and tried!  These pants did sit unfinished for a couple weeks because I was not wanting to fuss with button holes.  It was done in less then 5 minutes when I actually just did it!  EasyPeasy! 
Upcycle, repurpose, sew, sew, sew!  I got the bug and I can't shake it!  Must craft, gotta make, will sew for food!  What are you crafting, sewing, knitting, making?  What are you reusing, repurposing, upcycling?  Do tell.  Share, share, share! 
Working on the next pair of pants for J. Vintage stripes!  Will post photos when completed.  It's cut out.  Just gotta sew it!

Off to pick blueberries with The Crafty Aunties,
xox- Jennette

Altered Clothes - take 3, aka Leather Binge

FINALLY finished this leather bag I have been working on forever!  I really like how it turned out and what makes it even ten times cooler is that it is a complete and total upcycle/repurpose project!!  Uh huh!

Here's the dealio.  It was a full size Taiwanese leather trench coat.  I LOVED the color of it at the thrift store but I didn't love the price.   I asked the manager if she could do better on the price and to my utter amazement, she could!  I was actually shocked because it was Goodwill and I have begun to think of them as big corporate mucky muck and I think they usually cost too much.  I am so used to asking for the "best deal," or "is this your best price," or "can you do any better," from all the junkin' I do at yard, flea, estate, rummage sales so it just came out. And she said yes.  And she said how about $10?  Well, I gotta say, I still hesitated since I can find good leather to reuse at all these other types of sales and I never pay more than $5.  I didn't balk long though since I LOVED the color and an idea was starting to formulate.
  
Unfortunately, my photos of the intact and original trench are on the old computer that died but I was able to give you a general idea of what the thing looked like before.  Wow, right?!  I was able to cut out the mid section of the coat, on the seams, and still have the rest to do more projects with. 

I took off the plastic buttons, even though they were cool (saved em, of course), and hand sewed on two antler buttons that I had.  Then I used my machine, which didn't like any of this sewing leather business, to sew the front panel, next to the buttons, closed.

I had some left over deep blue velvet from a wrap around skirt I made myself last winter.  I really like the contrast of the blue velvet and orangey color of the leather.  This bag has a wintery feel to it but I am trying it out for a few days now!  I used the velvet to patch over the pocket openings, line the top edge and as the "belt!"  See the original belt loops, still in place?  The velvet belt slides right thru and cinches the bag closed if need be.  I think I should still add a magnetic snap. 

My machine was so unhappy about sewing leather.  Even though this isn't thick, once you add a layer of velvet, or dare to sew two layers of leather together, she gets pissed!  I went thru a whole package of leather needles and in the end I had to heed my lovely friend Suze's suggestion and take it to a shoe repair place to finish the last step of attaching the shoulder strap.  Thank goodness I did, since now its finished and I can actually use it, kinda the point of making it in the first palce!

I took it to Woodinville Shoe Repair and for $10 (I know, It ups my overall cost and defeats the purpose of bickering over the price in the first place, but it was so nice to just GET IT DONE!), they sewed my straps on for me.  Thank you shoe repair guy!  I think my friends Katie and Dianah both have kick-ass machines that would have don't the job so I will try that next time.  This time i got too impatient!
The shoulder strap is made from the original belt.  It was a thin belt so I just cut it in half, liked that length, and had him sew each piece on, side by side.
Here is the very simple but heavy duty sewing that was done at the shoe repair place.
 
Overall I am very pleased with how this turned out but I am not happy my sewing machine is such a wus.  I think I will have to trade up because I have A LOT of leather projects in mind.  Mostly bags and purses but also saddle bags for my vintage Schwinn, sword and knife sheaths for J. and various gifts and whatnots for friends and family.  I will let y'all know when I have some pieces up for sale :)

So, Sew, Sow!

Dishwasher broken so off to handwash dishes, Jennette


Altered Clothes - take 2

boring blue cotton dress, thrifted in Tucson, blah, blah, blah

I am not even sure why I bought this dress in the first place.  I guess I thought it would be an easy thing to throw over my swimsuit in the summer, even though I have about a hundred an one little cottony summer dresses like this.  ( just as many as the number of purse/bags now!) 
I was about to give it back to the thrift store in my weekly bag-o-thrift-store-crap-to-drop-off when I thought of putting some little front pockets on it.  I realized that my favorite summer dress have some sort of pockets and that I tend to wear them over and over instead of ones without pockets.  This idea led me to my massive and random stack of embroidered thingies: runners, doilies, hankies, aprons, etc from which to choose a pocket material.  It was becoming hard to choose because I have a ton of mediocre type pieces and I was looking for something outstanding.  Then I hit payday.  See below:
1 of 3, using two for the pockets

Tada!  Birds!  I lurve me some birds, I do, I do!  So I found these three linen doily type pieces that have a bird embroidered on them and and edged with some blue and white crochet/tatting/knitting?  Don't know ,but its lovely.  So I folded each one in half and figured out how to place them for pockets.
close-up of pockets

This will be a little difficult to explain but I pinned the right side of the oval shaped doily down first and sewed it to the dress in a half circle shape.  This created the inside of the pocket, or a pocket lining, of sorts.  Then I folded the top of the oval down, over the bottom half circle, wrong sides together now, to create the lovely pocket with bird you see above.  I just top stitched that down, over the first row  and now I have a lined pocket, no cutting involved, and doily is still in perfect shape in case I decide to ditch the dress, it gets ruined, too small, etc.  Thus I will be able to take the doilies off and reuse them.  Smartyparty!
love, love, love
finished altering
Now i just need to wear it!

Upcycle, rework, and try again!  Dance, dance, dance!  Sing, sing, sing!

Altered Clothes - take 1

thrifted strapless top turned into bag

Hello Y'all!  You will have to excuse me for just a moment while I whine, kvetch, and moan about there not being enough time in each day!!  Where do they go, these days of mine?  Monday, where are you?  You were a flash in the pan!  I actually miss you Monday.  I don't want it to be Tuesday, mostly because it means one day less this week to get "stuff" accomplished.  Oh, Tuesday, come on baby, be my day of massive "doing!"  Maybe I can stop sleeping and get it "all done."  There's an idea.  Why hasn't anyone thought of this before?!  Ha!

OK.  Enough of the complaining.  I have actually been trying to train myself lately to focus on the things I accomplish, instead of the things that are still left to do.  It's hard for me.  Being a first born, Capricorn, perfectionist and all.  But I try.  Thus, one reason I blog, is to document and convince myself that I do actually get some things accomplished!  Look!  I have some photos to prove it!  Now I just have to believe it;  That I do get enough done in one day and that the world will not go to pieces if i don't get one more thing made, one more project sewn, one more meal perfect.  Let it go, let it go, let it go....

So I made a few things!  I did get "something" done!  The above photo is of a pretty little strapless silk top I found thrifting.  It looked so sweet but I NEVER do strapless so I just kept looking at it, trying to figure out what it could become.  When all else fails, make a bag!  Like I really need another, when I have a hundred and one already.  I guess I should really consider selling some of these things!

this is what the original top looked like, bottom edge ruffle and all

In the first photo you can see the silk ribbon I used on the inside to make a drawstring type closure.  I have it hanging over the outside edge so you can see it, but it usually stays on the inside.  Since there was already a ruffle around the bottom edge of the top, I just turned it inside out, tucked in the ruffle, and sewed the bottom of the shirt closed.  Then, around the top, where there was a casing with elastic (to hold up the strapless wonder!), I seam ripped two little holes to thread the silk ribbon thru, and then I tidied up the two holes with a few stitches.  So now I can cinch the silk ribbon on the inside to close up the top of the bag.

close-up of the circle print detail and random sequins

For a strap, as you will see below, I used some left over materials.  I personally like things to look a little deconstructed so I like to use a hodgepodge of materials and textures.  I had some left over grey and dark greenish-blue silk and I had an old top that was batiked with lanterns, moons and stars, so I used a combo of these.  One side of the strap is all the batik and one side is random lengths of the silks, including the button placket from the dark greenish-blue.  May be a little hard to see here....
 
detail of strap

I love the prettiness, lightness, and effervescence of this frilly little bag.  It's not usually my style but for dress up it might be nice.  Its not super hardy and durable so I guess it is meant for once in awhile use.  What are you making, altering, upcycling, or crafting these days?  Do tell! 

Make love, do craft, and carry on! 


Buying Trip Treasure

Small child size vintage suitcase

vintage half embroidered pillow case

close up.  love the faded colors and unfinished-ness of it.
I will leave it as is but make it into a pillow.

soft hand knit baby booties

The Drake Casket Company.  A new brush for my brush collection. Strange.  But true.

vintage table runner.  embroidered at both ends with same scene.  perfectly faded blue bird and cherries.  Will become a bag and a pillow.

big blue vintage first aid kit box

small orange vintage first aid box

the new Royal blue vintage typewriter

the Remington vintage blue typewriter

vintage blue and green tool boxes

Some, most or all of this loot will eventually end up at M and M.  Come check it out or email me if you see anything that strikes your fancy.  More photos to come, stay tuned!

What do you collect?  What do you buy? 

Be awesome!

I've gone to Typewriter Heaven


Four typewriters, right now.  4!

Gotta love a good "old-fashioned" typewriter!  We always make sure to have one around the house, in full use, most of the time.  We make our "special" lists on it.  Like our "What was so fine about 2009" list.  I needed that one to remind myself that last year was good.  And what better way to make a list than on an ol' typewriter.  The kids LOVE them.  We often have a story line going, that every one adds to, and they end up so hilarious.  I put those ones away in the scrap book.  And having a typewriter always available gives Jasper something "important" to do when I am at the computer and he needs a task. 

We had two typewriters already and then I scored 2 more this weekend on my so-called buying trip.  For me its hard to believe that there are people out there who have no clue of the value of a vintage typewriter!  I cant believe how crazy cheap they are when you find them at rummage sales and yard sales. Lucky me folks, lucky me!  So I will be bringing two down to M and M to sell and I will keep my two favorites around here so we can use them and have a back up :)

This is the Royal Signet.  This one will be for sale.  We had it around here all winter but I just found this other Royal that we will keep for a while:

This is the Royal Century.  I think its a little newer but I LOVE the blue color of it.  It's a keeper!

This blue one is a Remington.  It was made in Holland and its case was made in West Germany.  It will also be for sale at the shop.  Both of the typewriters I am taking to M and M are in great working order.  Did you know you can still buy new ink tape for these at the office supply store.  Who woulda thunk it?!

This is the other one we will keep around for a while.  Its an Olympia.  Probably the most vintage of this group.  Big, heavy, beefy.  It still has a dust cloth and dust brushes in a little case and the operating instructions.  Gotta love the completeness :) 

I find that now days people are buying these to take the keys off to use in jewelry making.  It amazes me that someone will spend $40-50 on one just to get the keys.  Also, last year my friend bought one just to use as a sedum planter!  I know!  Sounds like something I would do!  I guess if I took all the keys off and had one in really bad, unusable shape, I would plant the top and key area with sedums.  It would be darn cute!  I actually have a picture from a magazine of some such beauty.  If I can find it, I will scan it, so you can see.  And if I do that, then I will also take a photo of my ANCIENT Royal typewriter I have from my Grandma, that was her folks, so you can see how magical it is!  Its so vintage it has beveled glass panels on the sides and back of it!  Its total awesomesauce!  I gotta dig it out so you can see :)

Type on a vintage typewriter, be old school, feel cool and be awesome!  Word!