Stick Painting

We did some stick painting after being inspired by Toronto based artist Ginette Lapalme
I think I found her through Design*Sponge, or maybe Design For Mankind
Lapalme is a designer/printmaker and also a member of the print collective "Halo Halo." 
Her blog, ETTE's is awesome!

We LOVE her stick paintings!

See below:
These are Ginette's 

I think she uses driftwood and found sticks.  She calls them sticx!

When our friend Sheina was moving back to Montreal, Jasper wanted to give her something special.  He couldn't stand that she had to leave. I suggested making a Laplame inspired piece that he could give her to take home.  Something to remember him by.

Here is Jasper's set up in the Fireball, pre make-over.  I was cleaning so he was keeping me company.  We used acrylic paints and sticks and driftwood we had from sea kayaking off Lopez and surfing at Westport.


He picked all the colors and got to work.


Here are our masterpieces drying in the sun before he wrapped his for Sheina.  She loved it!


Oh, Sheina!  We miss you!

It was funny because I was working on this post when into my Google Reader mailbox came this lovely little post from Anabela at Fieldguided about The Dazzle show at Narwahl.  Low and behold, I am scanning through the photos and wouldn't you know it, there is one with a glimpse of Lapalme's gorgeous work.  Funny because I wasn't expecting it but, duh, because Narwahl is in Toronto and that's where Lapalme is..... 
see:
photo via Fieldguided

So, needless to say, we have a whole pile of sticks and driftwood awaiting the attention of our colorful paintbrushes!  This is a great project to do with kids or as a group.  The contrast of the raw wood and the bright colors makes my heart do a little flip-flop! 
I love it! 

Go gather yourself some sticks and get your brushes out!  Show us what ya got!  And have fun!

Off to dream land,
xo
Jennette 

Pickle Progress

My Pickles are ready to pack in jars!
This is what the plate might look like when you take the weight off and it gently floats to the surface.  It is normal to see sediment in the form of unused starches and sugars.  And yes, your brine should look cloudy!  That's good and normal!

Stuffing half gallon jars with lacto-fermented Jennette's Kick-Ass Southwest Monroe Bucket Cukes.
photo by Jasper
7 half gallon and 2 quarts were filled.
Photo by Jasper

The rest of these photos are by August Williams.  iphone, Camera Bag app, Helga setting.

Ball jar, up close

Pouring in the nectar/brine.  If you have nectar left over, Save It!  It is great in salads, on potatoes, mixed in dressings, dashed in soup.

I store my pickles and left-over brine in the bickle fridge with plastic screw on lids.  It's probably best not to use traditional lids and bands since there is just a bit of vinegar in the nectar which could eventually corrode the lids.

Thanks for all the positive response to a pickle class next year!  We will make it happen!

It's sunny in Chelan today!
Off to the beach,
xox
Jennette


Holy Monsters!


I discovered this amazing Monster Quilt over at sfgirlbybay.

Are you dying?!?!

I am! 

The maker, an illustrator and cartoonist named Jillian Tamaki, is teaching herself how to embroider.  This is her FIRST project! 

Wow!
The detail is amazing!

The colors are Divine!

Her beginners ability is out of this world.  And the subject matter, come on, it's killin me!  I want this quilt!!
Makes me want to pick my embroidery needle back up, and get back to work on my dolls......
OK, I want a monster themed mini quilt in the worst kinda way.

Jillian Tamaki, you're my hero!  Make more, make more, make more!  And sell one to me!

Visit Jillian here.

Off to splash and drip blue paint around in the Fireball,

xox
Jennette

Half-Sours, Straight Up!

More Pickles,Friends!

Grape Leaves, Cukes, Sweet Peppers and Garlic

So I had a few handfuls of cucumbers left over from making my Kick-ass Southwest Monroe Bucket Cukes and they had to be fermented! 
The other pickle I love, besides those, and maybe even more so, are these ones:
Half-Sours, Straight Up. 
It's another recipe from my beloved, Quick Pickles by Schlesinger, Willoughby and George.
Of course, after all these years, I have tweaked the recipe, and really, that is such a lovely thing about pickling and fermenting veggies, you can do it to whatever you want!
I had a bunch of sweet peppers left over that were already "stabbed and slit twice."  So along with a Huge Bunch of Grape Leaves, I made my version of Half-Sours, Straight Up. 

Layering.  More cukes on top.  Then more grape leaves.

The Half-Sours, Straight Up are described as such, "Here it is, your chance to have a real, honest-to God pickle barrel in your own home.  A lot of people think of fermented pickles, particularly cucumbers, first and foremost as dill pickles.  But we made this particular version without the complication of dill.  We did so to allow you to taste the mellow flavor of the brine without much else besides a hint of garlic and perhaps some pepper-and also because, quite frankly, not everyone likes dill.
Upon tasting this pickle, one friend said it was 'like eating the ocean.'  In some cultures, fermented brines like this are drunk for refreshment.  To us, this particular brine, which we call 'deli nectar,' makes the perfect medium for poaching seafood."

The plate to hold it all down under the brine and keep it submerged.

Basic recipe for Half-Sours, Straight Up:

8 cloves garlic, peeled and gently crushed

2 quarts pickling cucumbers, 3 to 5 inches long, blossom ends removed

2 small leafy celery hearts

2 to 4 small hot fresh chiles of your choice, pricked with a fork (optional)

8 tsp kosher or other course salt

6 cups water

In a large nonreactive wide-mouth jar, crock, or pail, arrange the garlic, cucumbers, celery, and chiles.  Combine the salt and water, stir briefly to dissolve the salt, and pour into the jar.  Place a large plate over the cucumbers, and weigh it down with a clean stone or other nonreactive weight; the salt solution should cover the cucumbers by about 2 inches.  Cover the plate with a clean cloth and store at room temperature for 4 or 5 days, taking care to keep the contents submerged at all times and skimming any foam that may form on the surface of the brine each day.  look for fermentation bubbles slowly rising to the surface after 2 or 3 days. 
When the bubble action seems to have stopped and the cucumbers have turned pale green inside and out (4 to 6 days), give them a try; they should have a sharp crunch and rich, deep pickle flavor.  Immediately cover the container and refrigerate.
These pickles should retain their good crunch and flavor for 3 to 5 weeks, covered and refrigerated.

Well washed bottle of cleaning vinegar used as weight.

Here, again, I use a lot of grape leaves to help these stay fresh and crisp and it really works.  I have kept these close to a year in the "bickle" fridge.  The tannin in the grape leaves really does the job.
Here is some more on these pickles from the book: "Incidentally, this is a particularly good pickle to make with kids.  It's easy, and it has that aspect of magic and alchemy that kids find so appealing; they love to open the crock every day to see if the fermentation process is done.  Beside, skimming the foam each day gives them a sense of full participation, a feeling that is hard for younger children to achieve with forms of cooking that require heat."

I gotta admit.  When they said it was like "eating the ocean," I was sold!  Bring it, baby!  I just knew I would love them.

So what are ya waiting for?!  Go make some pickles, people! 

Enjoy the crunch and tang!  Yummm!

Off to veg (and ferment!),
xoxo
Jennette


Jennette's Kick-Ass Southwest Monroe Bucket Cukes!

Here is a twenty pound box of organic pickling cucumbers from Willie Greens Organic Farm, right here in our little Tualco Valley.
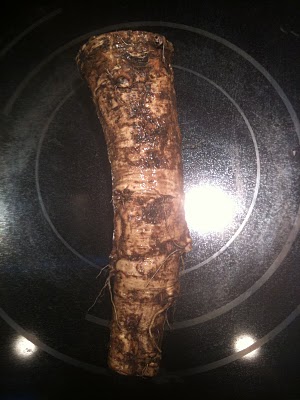
Unpeeled Horseradish Root

So I spent all day Monday on the hunt for all the ingredients I use to make these lacto-fermented pickles each year.  It wasn't an easy feat.  I went to no less than 5 stores and 2 towns trying to track down whole root horseradish, pickling spices, garlic, peppers, grape leaves, onions, etc.  Every year I think I will have my sources secured before the next pickling season and not have to go thru the rigamaroll of "the finding." 
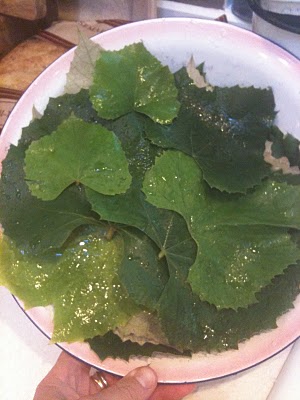
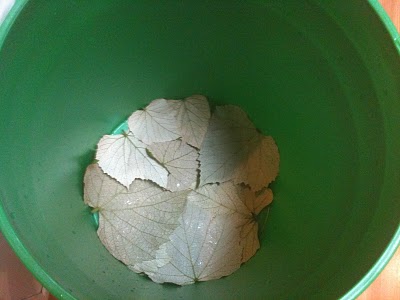
Washed Grape Leaves

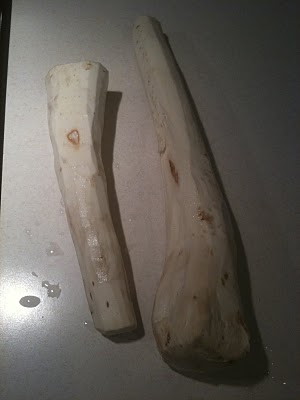
I see how it happens though.  I know why I get waylayed at the beginning, each time.  It's because I always suddenly realize that the cukes are on and I scurry like a mouse before winter to track down all the bits and pieces I need to hurry up and ensure that we will indeed have enough of my pickles to last until the next go round.  I never think ahead quite enough to go into it easy and smooth.  It's always a rush, drop everything, make it happen, kind of project.  I wish I knew for certain that I could get all these ingredients at my local farmers market but since there is always this time crunch, I am never sure if I will find horseradish and grape leaves the day I need them.
Peeled Horseradish Root

Which leads me to what I have been meditating on the last two days of gathering and making.  Our ancestors, our moms, grandmas, great grandmas and beyond.  How did they do it?!  I am currently fascinated by this.   How did they put up preserves without our modern conveniences?  Was it easier then because they grew every bit they knew they would need?  Was life slow enough that they had time to think ahead, even by a month, and remind themselves, "oh yes, I will need pickling spices next month to make pickles.  Might as well pick those up now....."  I can't get it out of my mind.  I am not complaining here, just observing and genuinely wondering what it must have been like. 
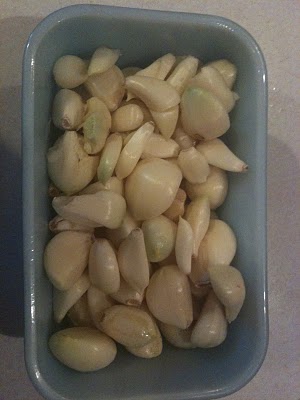
Hand Peeled Garlic

Were pickles a common preserve?  Before the war?  Or more so after?  I presume families were much more self reliant back in the day and they probably did grow horseradish and grapes for the fruit and the leaves, if they wanted to store lacto-fermented fruit and veggies.  How did they keep them preserved before refrigeration?  Lacto-fermentation must have existed, obviously, but how?
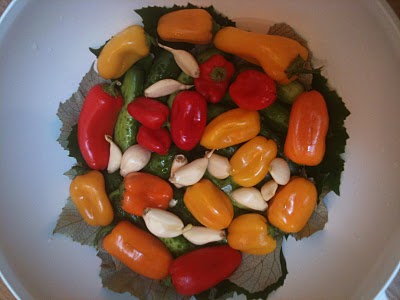
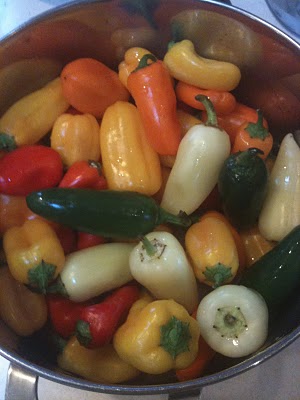
Variety of Sweet and Hot Peppers

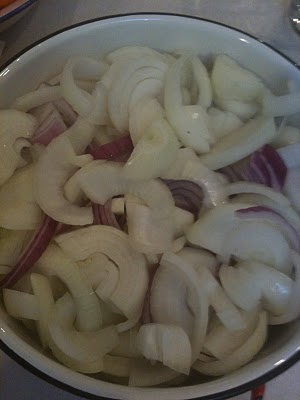
How do we, today, bridge the gap of time, to take care of our families the way we wish to and with the time we have.  How do we straddle two worlds, the rushed one we live in and the other one I want to stay in where I dress and live like Tasha Tudor (my hero) and make, create, and live very close to the earth in a slow dance of mutual love and respect?!!?  Where I do garden all day, make all my own food for my family, bake bread, tend the animals, milk goats, collect eggs from the chickens, make all our clothes, use my herbal knowledge to heal us and ride my horse into town when I have to.  Its a hard straddle!  Physically, emotionally, mentally, culturally.  Where do I fit in?  These are the things I keep pondering as I wait for my pickles to kickass and lacto-ferment.  
Variety of Sliced Onions

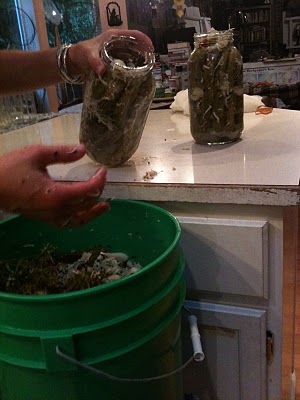
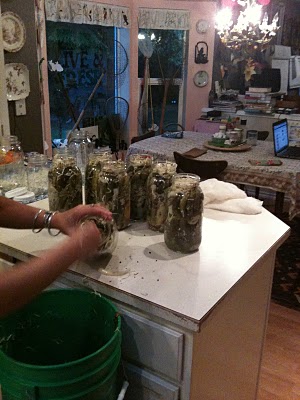
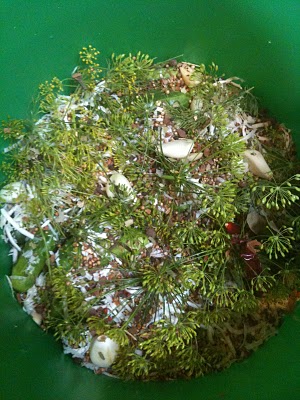
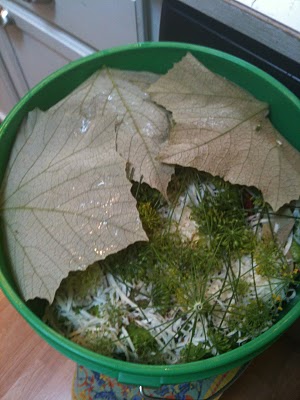
Back to the pickles.  I have been making versions of this pickle for many seasons now.  I have had the honor and privilege of attending two full weekends of Artisan Food Camp at RavenCroft Gardens when I was doing my Community Centered Herbalist apprenticeship.  One year I was a student and the next year I helped out behind the scenes.  We learned pickling, including kimchee, sauerkraut, and lacto-fermentation in general.  We also learned cheesemaking and wine, mead and beverage making, and yogurt making.  Basically we were taught how to culture and ferment foods in general.  It was awesome!      
I have two books I refer to most often.  Wild Fermentation by Sandor Katz and Quick Pickles by Schlesinger, Willoughby and GeorgeQuick Pickles has a fermented pickles section and it is here that many years ago I layed eyes on the base recipe I have used ever since. 
Dill and My Trusty Green Pickling Bucket

Many people say they make pickles.  I always have to ask how they make them.  Are they fresh or fermented?  I have never made hot water bath, vinegar laden, "fresh pickles."  For me, nothing beats the good lacto-fermented, make your gut happy, tasty goodness that is a lacto-fermented pickle. 
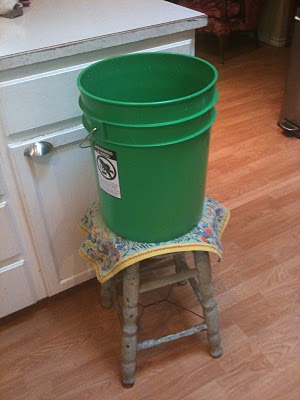
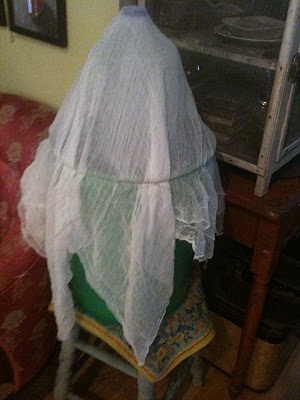
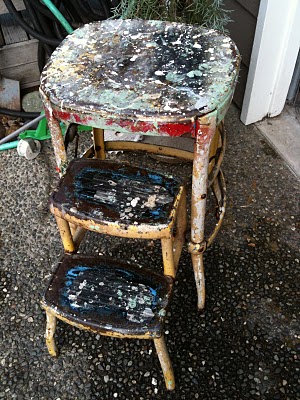
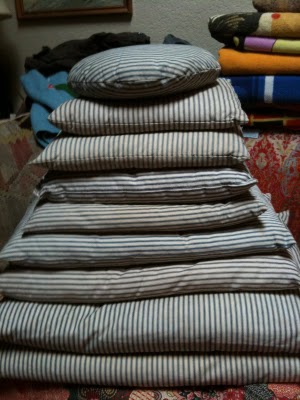
The Stool my Bucket sits on during Pickle Curing

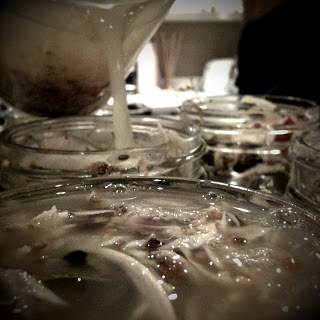
To lacto-ferment, you need a pickle fridge.  I have one.  Its in the garage.  It also holds beer.  So sometimes we call it the "bickle" fridge.  A little beer, a lot of pickles!  Lacto-fermentation requires you to ferment/cure your pickles for 4-7 days or so, in a brine, on the counter, and then to halt the fermentation where you want it, where it tastes good and tangy to you, they have to go into hibernation so to speak.  They need to get and stay cold but they don't lose their lacto goodness.  Lovely!
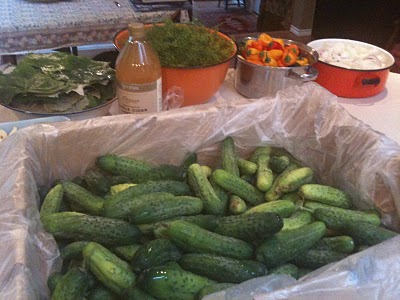
Ingredients!

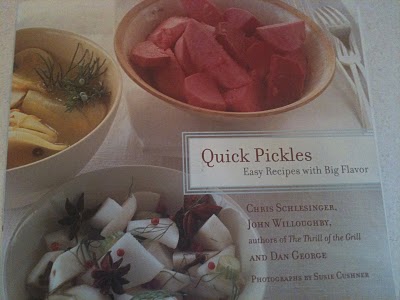
From Quick Pickles: "Fermented pickles are the aristocrats of the pickle world.  As such, they require a bit more time, attention, and fussing over than fresh pickles.  But they are fascinating to make, they really aren't difficult, and they have many subtle nuances of flavor.  It's not at all surprising that fermented pickles have complex, nuanced flavors.  They share this trait with other products of fermentaion, such as wine, soy sauce, sourdough bread and cheese.  Although it produces complicated flavors, fermentation is a pretty straightforward process.  Basically, what you are doing is creating an environment in which certain beneficial microbes found in the atmosphere multiply, while others - the ones that cause spoiling- are kept at bay.  In the case of pickles, the microbes we are looking for are bacteria (as opposed to, for example, yeast).  As these bacteria go to work, they create many flavorful by-products, one of which is lactic acid.  Like the vinegar in fresh pickles, the lactic acid helps preserve the fruit or vegetable.  Salt is the agent responsible for keeping unwanted microbes out of the action as fermentation takes off.  So these pickles start off by being either mixed with salt or immersed in a salt brine."
The Book

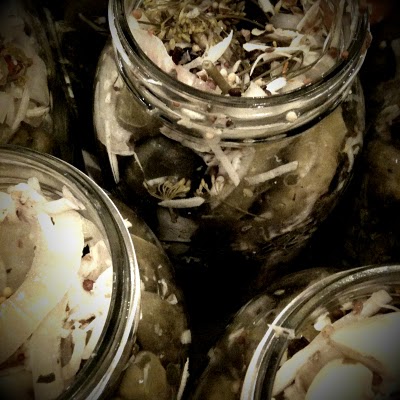
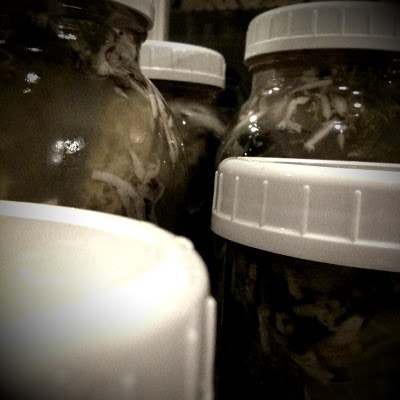
The Horseradish and Grape Leaves are very important.  Not only does the horseradish add flavor and heat, it acts as a "crisper!"  Along with the tannin-rich grape leaves, horseradish helps to keep your lacto-fermented pickles crisp during storage.  I was taught to use a lot of grape or oak leaves and I keep my pickles for a year in the "bickle" fridge.  They never get soft or mushy.

Basic recipe:

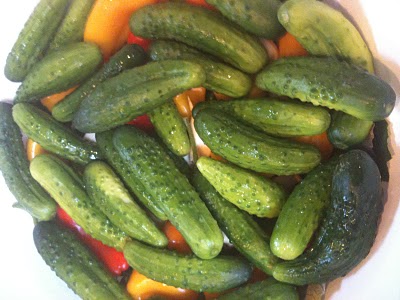
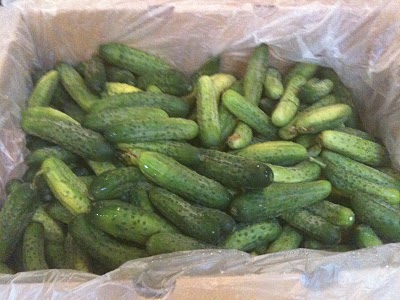
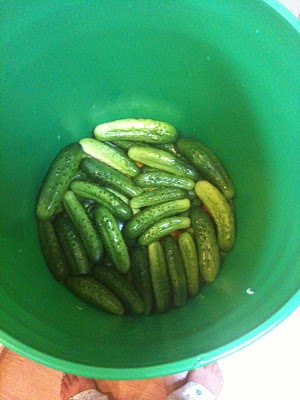
4.5 pounds pickling cucumbers, 3 to 5 inches long, blossom end removed

1 or 2 handfuls small fresh chiles of your choice, stabbed or slit twice

1 large head garlic, cloves peeled and minced

1 cup peeled, grated fresh horseradish

1 large onion, peeled and sliced into disks about 1/2 inch thick

1 handful dill fronds (optional)

2 tbsp yellow mustard seed

2 tbsp coriander seed, cracked

1 tbsp black peppercorns

4 bay leaves crumbled

1 handful grape, sour cherry, or oak leaves, well washed (optional)

8 cups water

1/2 cup white wine vinegar

5 tbsp kosher or other course salt

In a giant bowl, combine all ingredients except the water, vinegar and salt.  Pack this mixture into a crock, jar or bucket.
In a large, separate nonreactive bowl or pitcher, combine the water, vinegar and salt to make the brine, stirring until the salt dissolves.
Cover the cucumbers with a plate, then weight the plate down with a clean stone, a brick, or whatever you have available; the idea is to keep the cukes and everything else completely submerged as they pickle.  Add enough brine to cover the cukes by 2 inches or more.
Cover with a clean cloth and store at room temp for 4-7 days, taking care to keep the contents submerged at all times and to skim any foam that may form on the brine's surface every day or two.
These pickles are done when their pale green color is mostly the same inside and out-or when they just taste so good your discipline falls apart.  They will keep, covered and refrigerated, for a month, but they start to soften around then unless you have plenty of grape, cherry, or oak leaves.  To freshen the flavor of the brine you can strain the solids out of the liquid, bring the brine to a boil, cool it to room temp, and re-immerse the cukes and other veggies in it, discarding the original flavorings and freshening the flavor with more of those same flavorings.
First Layer of Grape Leaves

Here is how I make my pickles and what I do different from the basic recipe:

I always layer everything.  I do not mix it all together and dump it in.

I always make at least 20 pounds so I effectively quadruple the recipe.

I always use a skewer and poke a hole through the pickle, end to end, so the brine can get in.
I touch every aspect of this recipe in that I pick and hand wash every grape leaf, I hand peel every garlic clove, I wash, chop and peel every ingredient by hand except for the horseradish. I use my food processor to grate it, and I do hand chop the onions right after to get all the massive tears from both onions and horseradish, over and done with!
You could use already peeled garlic, but the rest needs to be hand done.

I use a variety of pickling spices, already premixed, and I like that I never know if my pickles will taste the same from year to year.  They never do taste the same and I love that!

I use as many grape leaves as I can get my hands on.  You cant use too much and I want my pickles to last and stay crisp.

I always use organic unpasteurized apple cider vinegar, not white wine vinegar.  This is a hold over from RavenCroft for me and I am sticking to it!

I keep notes every year so I know what I have tried in the past, what worked, where I got ingredients, etc.

I use my trusty green pickle bucket to ferment and cure my pickles then after 7 days or so I hand pack everything into half gallon glass jars to store in the "bickle" fridge.
Let the layering begin!

More Layering

Getting toward the Top

Last Layer of Grape Leaves before Brine

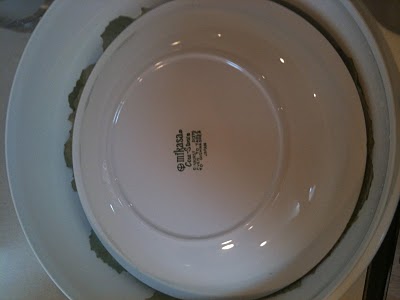
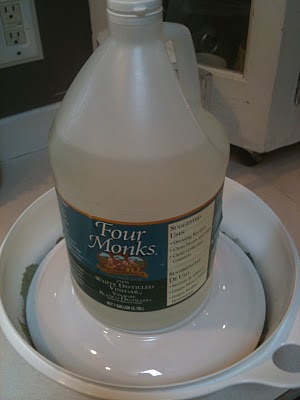
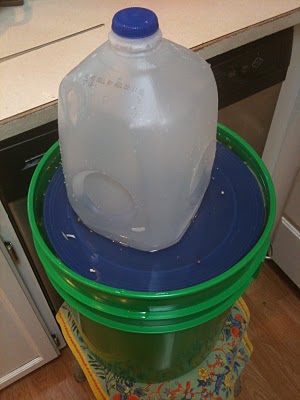
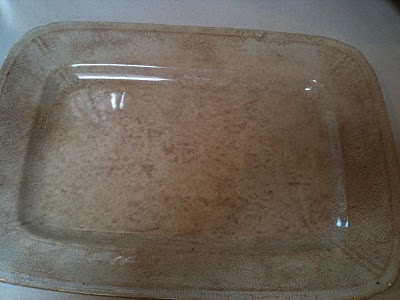
I always use this Fiesta plate because it fits perfectly inside.  And I always use a gallon of water to weigh the plate down.

Draped in Cheesecloth so no little buggies get in.

So what are you waiting for?!  Go make some pickles!

I have had enough people ask me about my pickles that I am considering offering a class next year.  Everyone would go home with a small bucket of pickles.  What do you think?  Any locals out there interested in this?  I will start to keep a list of interested folks.  I would send you home with recipes for sauerkraut and kimchee too. 

Off to continue researching Sayulita!  Surfing Christmas and Birthday, here I come!

xox - Jennette


(Last) Friday Finds

Here are a few things I have found in the last few days:

Vintage Oil Painting in Antique Frame

A Mismatched Set of French Ivory Forks for the Fireball


Large English Ironstone Platter.  Love the Crazing!

Perfectly Paint Splattered Steppin' Stool

A tiny German Cuckoo Clock for the Fireball

A Vintage Tambourine

A Vintage Leather Wallet from the 1934 World's Fair

A Vintage Butterfly Napkin Holder for the Fireball

A Neat Old Photo
Three Holiday Reindeer

Two Swedish Enamel Dishes for the Fireball
Vintage Felt Snowman

Two Different Beeswax Candles.  Pinecone and Bunny

Transferware Egg Shaped Dish.  Lovely

Honey Pot

Bakelite and French Ivory Handled Knives and Server

Old Painty Brush

And a Glass Flask.  Very Important!

So that's a few of the items now lingering in my garage.  I have such a massive load of items to price and get down to M&M.  I will post a quick note when I take new items there and try to show pictures too. 
I did get my ETSY account initiated but I have a lot of tweaking, finishing and learning to do before you see items listed there for sale.  I will definatley publish a big grand opening post when it is up, running, and filled with items to purchase.  Hopefully this will happen in the next few weeks.  But until then I will continue to buy and make great stuff and you'll see it there soon. 
I also hope to get some regular features going on here at Smashing Rubbish.  Friday Finds will become a show and tell of new items bought or found during the past week.  I will continue to share crafts, repurposed and upcycled projects, art work, sewing projects and the like, as well.
Thanks to those of you who leave comments and feedback!  I appreciate it and I love reading what you say!  The only way I know to respond right now though is to post a comment back in the same post so check back if you are waiting on a response from me.

Off to finish getting my pickles lacto-fermented! 

Jennette's Kick-Ass Southwest Monroe Bucket Cukes
coming right up!

xox - Jennette


Oil Painting Tote Bag


Yep.  It was an oil painting.  Stretched canvas over a wooden frame.  This may not be everyones cup of tea and there may be varying degrees of opinion as to the appropriateness of cutting a painting off a frame and making a tote bag out of it.  But I really took to the idea after I was inspired by this article over at Design*Sponge.
Swarm, run by Leslie Oschmann in Amsterdam, looks amazing. 
I see these great, cheap, interesting, quirky, oil paintings at sales all the time.  They aren't master works but someone did take the time to make them.  When I can get them, especially this size, for $10 or less, I grab them up.  I have a handful more in the works.  I will show them to you as they are made.  I am trying different techniques with each to see what works best and highlights the painting.

Here is the pagoda oil painting after I cut it off the wood frame.  It was large but I decided to use the whole piece.
This is the vintage cotton toile I decided to use for the liner material.  I cut it out the exact same size as the painting.
This is the inside pocket, sewn right to the lining.
Here is the bag almost finished but needing a strap.
I still need to attach some kind of closure.  I am thinking of a magnetic snap on this one.  Then I want to try one with a zipper and then one with a drawstring or ties.
This is the painting, right sides together, side seam sewn up, adjusted so seam goes down the back of the tote, bottom sewn straight across, being turned right side out.
Oh, before turning right side out.
Close up of how I make the bag turn into more of a tall box, by giving it square corners.  You make the liner the exact same way, then attach them together.
I haven't got a close up of the strap but I choose a woven strap in blues.  It was just the right length to double it so I cut it in half to be able to have a tassel at each side and sewed the strap, doubled, to the edge of the bags.  I will try a few different strap methods in the next bags as well to see what works best, lasts, looks best.
Here is the back.  See how the side seams meet in the back.  I used the entire painting making the bag as I did.  And I am reusing the wooden frame the painting was stretched on in another project.
So the tote has already come in really handy for carrying all our towels, snacks, water, etc to the pool and the lake.  It is huge for a tote but it will be good for the library too.
I am testing this one out to see how durable it is and how long the painting lasts when in use like this.  I am now thinking I should have sprayed the painting with some kind of shellac, varnish, or top coat to help preserve the paint and make it more durable.  I need to go see what my options are at the hardware store tomorrow when I pick out paint for the Fireball.  I could spray it now but it may soak through to the liner fabric and be stinky or stain it. 
What do you think?

Off to drop Gus at his first day of work scooping icecream at The Fair,
xo-
Jennette


Vintage Suitcase Dog Bed


Looks like a vintage Samsonite suitcase....

And it was.  A big tall one.  Or extra long, I suppose.  Opens end to end, not on the side.

I forgot to have the family take pictures of me with my safety glasses on and saws-all in hand when I went to town on the hinges of this suitcase to get the two pieces to separate.  Oh well.  You can imagine it, right?!  It was easy work.  No one got hurt!
Here is a picture of what would have been the bottom on the suitcase.  It has all the latches and handles on the sides.  Instead of trying to pry or cut off all the latches, I kept this piece to use in an art project.  It will become a shadow box of sorts..... or more like a modern diorama, filled with interesting objects at varying degrees of depth and distance.  The result ends up being a sort of low-relief three-dimensionality.  But that's a whole 'nother project!!  Back to the repurposed vintage suitcase dog bed!

Here is the top half!  We had two old pillows that were going to the thrift store so instead I just relegated two older flannel pillow case to be the covers and now they belong to Shotzie!

I've been seeing these in magazines lately and online .  All the rage, upcycling suitcases, pampering your pet!  Lots of times the top is left opened and propped back against the wall, and holds doggie objects, like brush, toy, etc.  Or even a photo or piece of art!  Since this one opened end to end, I didn't have the room to leave the bottom on.  Shotzie's bed sits under a full size, old-school free standing chalk board that takes up a lot of space.  You cant really see it here, but it also limits the size and dimension of his dog bed.

Here is shaggy Shotzie, in all his glory, getting comfy in his new bed!  He needs his eyebrows trimmed!  But he loves his bed! 

I may make one more of these, with the top and bottom left intact, to use as a travel bed for him.  I found this particular case back in early summer when Jasper was going to Circus Camp in Georgetown.  Some girls pulled up in front of The Foundry, their car full of vintage cases, trying to sell them to the shop owner.  He didn't want them but my smart friend Natasha suggested that they let us take a look and they did!  They had some cool cases that looked like leather but when we opened one a dust cloud of mold and mildew spores plumed out so big and stinky it was all we could do to close it up and throw it back in the car!  It was gross!  And I deal with a lot of old gross stuff but some of the cases these girls had were nasty!  But not this one.  Not the blue Samsonite.  And it was an unusual size.  Long and tall, opening end to end.  I offered her $10 and it was mine.  You just never know what you'll find on the side of a road!

Off to pick paint colors for Ms. Fireball.
Have a lovely little day,
Jennette

1961 Fireball

We bought our 1961 Fireball Travel Trailer back from my brother!

 A couple years ago we got some crazy wild hair up our hiney and decided to sell our sweet little travel trailer to my brother.  Why we did, I am still not sure!  But he got some use out of it after hauling it all the way back to Jackson Hole and then back here to Leavenworth where he lives now.  He is getting ready to be a dad for the first time and is selling everything he doesn't absolutely need.  Lucky us because I had been telling him for a while that I wasn't sure why I ever gave the Fireball up in the first place and that I wanted first dibs on buying it back.  Low and behold a few weeks later he found out he was going to be a dad by next spring and we were on our way to buying our "baby" back!  
We bought this sweet little vintage trailer way back in 2001 or so.  It has served us so well as an extra room for guests!  When we bought it we didn't even have a way to haul it to our house.  No truck, no trailer hitch.  My dad moved it to our house for us.  And that's when I went hog wild with paint and fabric!  Now when I look inside, I ask myself, what was I thinking?!  It looks like a carnival exploded in there!  Every surface is a different color.  I think I just went and bought all the miss matched $1 paint colors from the hardware store and went to town!  Also, I used some really great vintage fabric to recover all the cushions and make curtains, back then.  On this front too, I wonder what the heck I was thinking.  More the merrier, maybe?  Every surface is a different pattern, colorway and design.  Way to busy for my taste now! 
Anyhow, this time around will be a little more civilized!  I am repainting and recovering every surface and hanging new curtains.  This time I will take a cue from the sweet vintage table top pattern and the color of the original tiles and oven, to create a nice, calming, blissful, little vintage travel trailer to call our home away from home.  I bet it still mostly gets used as a guest room but it will be nice to have just perfectly cute when we do get to haul it across state lines, to the beach, or near a river.  I will share some photos below of its current condition and then as I begin to work on it, I will post more of its progress.  Onward Ho!

 
Yellow stove top and oven.  One of my favorite features.  Jasper said, "Yes!  Now we can make scones in the middle of the woods when we are camping!"  You said it son!

The pattern on the table top and counters.  Love me some spirals!

I was so happy to see that the turquoise dish drain was still with it!  The couch slides out to make a double bed and the over head bunk slides out to make a single.  Also, the table breaks down into a bed as well.

Original paperwork in the cabinet.

State of California, Division of Housing!  Did they sell these for people to live in?!

So I have a lot to do!  As if all my sewing, crafting, antique mall space, Etsy set-up, and busy life were not enough already!  Now I've added this little project in the mix!  I cant wait to show you a photo with the banner canopy I made for it a few years ago.  I didn't give that piece to my brother and just found it the other day!  I will have more photos soon and until then, enjoy the rest of your summer!
Happy trails and travels,
Jennette

Studio Fort

There is a fort set up in my studio space.  Jasper has slept here the past two nights.  The first night he fell asleep watching Secret of Roan Inish and the second night he fell asleep watching Whale Rider.  Two of our favorite movies.  The fort has to come down today so I can get some work done.  Lots of sewing needs to happen.  I have 27 new/old patterns I have picked up in the last few weeks of zigzagging across the state.  Love me some vintage patterns.  And I have scored a ton of new/old fabric.  Projects galore coming up, folks.  Lots in the pipe line.  Be on the lookout!

Off to pick our late blueberries and check the bees.  Wish me luck!
xo-Jennette

Ticking


In between loads of laundry, dishes, repacking camping gear, and general frenzy of coming and going, I was able to take a moment to document all my ticking pillows.  Most of the striped ticking was packed away in our camping gear and I had mostly forgotten about how much ticking I have.  
 
Having all this ticking out makes me want to leave it all out.  To drool over.  To smile at. 
Here is the floral ticking below.  
Love some floral ticking!

Now to figure out what to do with all this ticking.  As if there is really anywhere left in my house for it to fit.  I guess I could stack pillows around like I stack books around.  Yep.  That's what I'll do!

Off to water the deck plants before hitting the beach,
xo,
Jennette

Return


We have returned from the ocean, our family reunion and general whirlwind of travel. 
I am happy to be home for a few weeks.
And I will be catching up on house chores, blog posts, and sewing soon.
Thanks for continuing to check in on my little corner of blogland.
Off to commune with my piles of laundry, xo, Jennette

Pickathon, I miss you!

Goofin off at Pickathon!

Oh, I can't believe it's over.  My beloved Pickathon 2010 has come and gone.  Oh, how I miss you, my Pickathon, my roots, indie, americana, folk, alt country Pickathon.  Not one other subject has been spoken of since our departure.  We will reminisce about you till the end of our days.  You give love in mega doses.  It's just like the sign in the barn says, "Your pleasure is our motto!"  True dat!  I was as pleasured then as I am now, to have the memories and loads of new vinyl to listen to. Pleasure, pleasure, pleasure.....
This may end up being a HUGE post!  I took a lot of pictures and video.  May have more images and less words as we progress.  And so.  Here we go!
Our trip started on Thursday when we camped at Beacon Rock State Park, on the Washington side of the Columbia river, in Skamania county.  Gorgeous!  We loved it and cant wait to stay again next year.  Camping here made it so that we were less than an hour from Pickathon so we could roll in early on Friday morning. 


On Friday morning we had breakfast
then bought some local honey at the entrance to The Bridge of the Gods and crossed over to Oregon.


Once at Pickathon, the real fun began!  There are a million cool things about Pickathon and one of them is that for the entire weekend, there are kids activities scheduled.  So after we set up camp we headed over to the Circus Cascadia area to try our hands at some circus stunts.  They also have yoga, self defense, tracking, wild edibles and medicinal plants walks, crafts, story telling, music workshops, theatre performance for the kids to experience.  Way cool!

Chad doing a balancing trick.

Gus on stilts.

Me on the balance board.

Jasper Hula Hooping!  By the end of the weekend he could raise his arm over his head, twirl the hoop up to his wrist, back down around his neck, and back down to his waist, all in one non-stop whirling dervish minute!  He loved it and boy did it wear him out!  He slept well at Pickathon!

Now for the music and musicians!
This is a (not so good) photo of Sam Quinn and Jill Andrews of the Everybodyfields doing a workshop in the Workshop Barn.  Oh yeah, another cool thing about Pickathon, they have an entire barn dedicated to workshops with all the musicians, on all different subjects.  Incredible!

The Fruit Bats in the Galaxy Barn!  I was SO excited to see these guys.  Big fan!  And I got to see them perform twice plus I attended Eric Johnson's banjo workshop as well.  Good Stuff!!

One of our favorite bands to return to Pickathon was Breathe Owl Breathe. Here they are on the Fir Meadows stage. We discovered them at Pickathon last year, have since seen them perform three times in Seattle, on of those at a house concert, and then again at Pickathon this year.  Yes, we are stalkers!  We love B.O.B.!!!  More below:
 
Here is Breathe Owl Breathe on The Woods Stage, a stage set in the middle of a magical forest.  Here are my kids watching them in awe:

A picture August drew about one of B.O.B's songs.

This is Michael Hurley's back!  Ha!  Love this guy!  Another awesome thing about Pickathon is that all the artists hang out in the crowd, checking out their favorite music too, and you get to see them, talk to them, appreciate them and get to know them.  It's Lovely!

Here are the Red Stick Ramblers doing a set in the Workshop Barn.  I love these guys, they are super cool, but I do love me any kind of cajun/french/Lousianna-ish music!  Chad and I were in Baton Rouge(Red Stick) last fall to see the Avett Brothers and bought both Red Stick Ramblers and Lost Bayou Ramblers, who we saw last year at Pickathon, CDs.  This is dance your booty off kind of music!  And boy did we!

Here are the Black Lillies on the Woods Stage.  Before we left town on Thursday morning, we had spent Wednesday night at The Tractor Tavern watching these amazing Knoxville musicians, along with Sam Quinn and also Chatham County Line, who I didn't happen to get a photo of but who are an amazing North Carolina string band and also played at Pickathon as well. 

This is Sean Hayes playing on the Mountain View Stage.  Look at the pretty clouds!  It was SO HOT over the weekend, the clouds provided random and welcomed bits of shade.  You can see Mt. Hood from here too but not in this picture.  Sean is an excellent musician from the San Francisco area. Bought a CD of his.  Also bought 3 Bonnie "Prince" Billy and the Cairo Gang albums on vinyl, 1 Michael Hurley vinyl, 1 Anais Mitchell vinyl, 1 Chatham County Line on vinyl, 1 Black Lillies on CD, and 1 Jill Andrews on CD.  Already had 2 Breath Owl Breathe on vinyl and CD.  Lots of new music to listen to!  Yay!
We saw a ton more music but I didn't get pictures of every single band or performance. 
 The last thing we saw before we left late Sunday night was Bonnie Prince Billy and the Cairo Gang on stage and it melted my heart.  LOVE me some Bonnie Prince!  I go gaga over them!

Pickathon is also a great place to meet up with friends and make new friends.
Here are some friend photos:
  
Karli and I chillin in the sun.

Eric, Karli, Cedar and Rowan visiting our camp sight.  We adore this lovely family and miss them now that they live in Port Townsend.  Don't get to see each other much but love it when we do!

Me with Tony, Daisy, Ruby and Cash.  Love these guys and have lots of fun being with them!

Jasper with Ruby and Cash.  Jasper LOVES his friends so much and it was such a blessing for him to have other children to run wild with all weekend!  Wore him out so he would pass out with his big brother in the tent each night so his momma and papa could go get their groove on!

Jasper with me and Daisy, my better half, more sweet, super cute "twin"!

Next I will show you some pictures from around the farm.  Pickathon is held on Pendarvis Farm in Happy Valley, Oregon, about twenty minutes from Portland, but out in the country.

Some of the "critters" around the farm.

Ewwww!  No, these feet aren't bruised!  They are DIRTY!!  This is what feet look like when you are having fun camping on a dusty farm!

Another farm critter and a 7th annual Pickathon t-shirt.  This was our third year attending and it was the 12th year of the festival.

Here is the amazing outdoor showers under the red tents, all made of wood and beautiful and gorgeous.  And an Airstream turned into a sauna!  Yes, a sauna!  And the other photo is of the Pendarvis Farm House.

Here is a back view of the stages with the sails strung overhead for shade and a view of the farm house mini amphitheatre in the backyard.

Pickathon is one of the first festivals I have attended that is committed to going green.  They offered one pint Klean Kanteen stainless steel cups for sale AND offered NO PLASTIC OR PAPER!  Can you believe it?! The food vendors offered some cups but gave a discount if you had your KK cup.  The bottom of the cup says, "Eat, Drink and be Wary of Plastic."  Love it!  KK made the first BPA-free stainless steel water bottles.  It is awesome that Pickathon held an event of this size, with the help of Klean Kanteen and was able to pull it off with no plastic or paper cups!  It should be the law!  In the beer garden you paid $5 for the cup and then you could buy your beer or wine. We bought a set for our vintage travel trailer and we bought the Pickathon cup cozies to use with them.  Perfect! 

So now we are home.  And unpacking and repacking for a trip out to the Olympic Peninsula for a family reunion.  I have a lot of new music to listen too and I am happy for that.  The last three or four weeks has been a whirlwind of coming and going, trips, and lots of good times.  I enjoy it.  But I am really looking forward to being home next week, for a good solid three weeks, before another trip away.  I miss my crafting, sewing, gardening, friends, and house. I am sure my space at M&M is looking atrocious.  Lots to catch up on and do.  But I wouldn't trade it for the what the last few weeks has provided in fun, experience, and adventure.  Love you summer.  And miss you Pickathon.

When I Shop

When I go shopping for, well, everything, the back of my car ends up looking like this.

And the seat next to Jasper looks like this.

When I sort through all that stuff I bought at tag sales, thrift stores, flea markets, estate sales, auctions, etc., and after I get most of it priced, the back of my car looks like this when I am getting ready to take it to the antique mall where I have my space.  Bye bye goodies, hello paycheck!

Jasper is such a sport about being crowded in with all my good junk. 

This is one view of what my space at the mall looks like.  Stuffed full of vintage treasures!

Come take a peek if you are in need of some bad-ass, uber cool, stylin', good junk!  All our vendors have unique and interesting items and our inventory changes daily.  My hope is that by late fall I will also have an Etsy sight up and running so I can have another outlet for my smaller items and the few things I make.  I will keep you posted but until then, come visit M&M Antiques and Collectibles at 119 W Main St., Monroe, WA.  98272. 360.794.7660

Gotta go unpack from our whirlwind last two weeks of visiting Westport, Chelan and Lopez Island,
Whew!  Wish me luck!
Jennette


Sun, Sand, Surf

Back from surfing and playing in Westport.
We had a fun time and wish we could have stayed longer.

Its difficult to get good surfing pictures so here are a few from before and after.


Laying by the pool.

Getting a fire ready for s'mores.

Shark attack!

Watching the surfers at The Groins.  Not confident enough to surf here yet.  Some day though.  One day.

If you haven't been to Westport and you like to be near the shore, you should check it out.  It has a marina so there is fishing, crabbing, and lots of boats too.  We surf in the morning and hang out the rest of the day.  Its a great place to bring bikes or take hikes.  You can visit and climb the lighthouse.  We find neat treasure on the beaches and its an excellent place to fly kites.  Westport is kid and dog friendly and a couple places have outdoor pools for summertime swim fun.  If you want a weekend get away, check it out.  It's just three hours from our neck of the woods outside Seattle.

Off to enjoy the heat of Lake Chelan by floating around on my gator,
ttfn sweetie pies,
Jennette

Striped (vintage looking) Pants

Here are the finished Oliver + S striped pants for J.

They were made using the same pattern from this post.  Its the Oliver +S Sandbox Pants Pattern & Starfish Stencil.  This time I layed out the pattern, pinned it and cut it in one sitting. That only took about .5 hours or so.   And then did all the sewing, start to finish, in one evening.  That took about 2.5 hours.  So 3 hours or so all together.  Not bad.  It took a lot less time, this time around, since I had used the pattern once before.  Reusing patterns helps you get faster!

back view

This fabric is not near as hefty as the last fabric I used.  Its a little more flowy.  It was also curtain panels and I have a lot of this material left.  I did the pockets so that the stripes are crosswise.  I like the contrast of the vertical and horizontal lines.  Shows off the pockets a bit.

Jasper loves to model for me,

can't you tell,
he wants to be a star.

Love that boy
and he wears awesome pants!

ttfn,
Jennette