Amulet Magazine


maybe you remember that back in november i mentioned i was invited to submit a piece of writing for a new online magazine...

well, this is it! 

Amulet is available now so don't linger here too long...
pop on over and see what all the hype is about.
you will be pleasantly stunned and completely thrilled.
guaranteed.

"Amulet is a vessel for simple connections.  It’s a field guide to not only wise living, but a place where we can boldly say: We are PeaceKeeper & WorldShaker.  We are Mother & Other.  We are what casts light and digs deep into the shadow of the soil.  Here is what we do.

We witness the seasons turn and the moon change shape and consciously take part in that dance. These have always been the ways of the woman, to time keep the seasons.
We honor the rhythm that rolls with the beats and meters of the Earth,+ beyond. These rhythms are meant to ease our worries, smooth our stress, and bring us back to what nourishes us: our connections to Earth, our family, our creatrix, our community."

my piece is a DIY project, Accessory as Medicine, Imbolc Foraging Pouch.  please do let me know what you think and if you decide to make one, send me a photo!

Make to Mend,
xoxxx
jennette

 (photos property of Amulet Magazine)


Birch Bark Press


when i was running last week, i found some birch trees in my neighborhood that had shed their bark.


i have this amazing and handy wood press that suze found for me at an estate sale. 


you can see that you can just layer in the birch bark, in between sheets of paper and cardboard, and then crank and turn the press down to hold it tight and secure.


i set the press aside for a week or so


and when i took out the birch bark pieces, they were dry and flat!


now i have a pile of flat dry birch bark for projects.
yeah!

i have been feeding some other dry birch bark i have into my typewriter (in the photo above)and typing little messages.  i tear these out and glue them, very carefully, to the birch branch "tree" i have in the shop.   it takes the place of a "carved" tree trunk and its fun to find the random messages all over it.

i also love using this flat bark paper to write notes on, love letters, and poetry.  watch out friends!  i have a whole pile of birch bark now!

what would you do with it?!

nursing my christmas cookie sugar coma,
xoxoxox
jennette

p.s. don't forget, the shop closes by 4pm on Sat. Dec. 24 and reopens Wed. Jan. 4 and noon!


Paper Mache Bee


i did some paper mache recently and thought i would share a nice way to give new life to old plastic crap!


like this plastic crap!  i found this at the thrift.  and as i am attracted to all things honey bee, i had to nab it.  but alas, i hate the plastic-ness of it!  so i figured i'd use it as a base and paper mache over it! 

smarty party much?!
just joking!
(kinda!)


since i have been "going gluten free" i have all this wheat flour in my kitchen i need to use up somehow.  so why not mache paste?  It turned out a bit bumpy and clumpy but it ended up ok with this extra texture.

working away


gettin somewhere

completely covered and starting to dry

after it dried i gave it a coat of thinned out white acrylic paint.  i wanted some of the print from the newspaper to show through like you see on Ann Wood's boats

a view from beneath


so the semi-opaque white honey bee is just hanging out in the shop.
not sure if i will try to add color or detail.
but i am happy to not being looking at the plastic-ness of it anymore!  it's been transformed, upcycled, and repurposed!

what are you all crafting lately?
gifts?
me too!

going home soon to play with boxes, wrapping paper and ribbon!
xoxox
jennette

p.s.
don't forget the shop will close at 4pm on Saturday December 24th and will reopen Wednesday January 4th at noon.
Thanks for all your support!


Magical Woodland Tree Topper


here is the magical woodland tree topper i finally made!

it was inspired by the two below that anthropologie offered last year.  they were both close to $400 a piece!!
yeah, crazy, right?!


anthropologie's teeming forest tree topper


anthropologie's mythic nest tree topper


my friend natasha found this crazy plastic piece of who-knows-what on the side of the road and thought it was the right shape for a tree topper!  smarty party!


this is what the base looks like, upright, with moss and twigs glued to the bottom.  i used a glue gun for the entire project, which is one of my favorite tools, but i am still finding hot glue strands/webs to pull off each day!  and i covered the bottom so that when this is up on the tree, you don't see plastic when looking up at it.


i had been collecting material all year, saving little bits of this and that, knowing that we would finally attempt this project, this season! 


before natasha had found this plastic piece i had begun to make a lot of tree topper bases out of strong cardboard and a cardboard toilet paper tube in the center.  i was envisioning the tube slipping nicely over the top of the tree and the lightweight base resting easily in the supporting branches near the top of the tree.


like this!  and even this odd plastic base is light enough for a small sturdy tree.


i still have several cardboard bases i will continue to work on but i think this one will be for my family. 


a few weeks ago i had the idea to add some silver glass glitter to some very small paper-wasp nests i had.  i was thinking ahead knowing i would want to attach one to my magical woodland winter scene.  i think it looks rather awesome!


and here too, i had glittered some pieces of the inside paper comb.


another tree top image.  it really looks like a fantastic woodland crown on the top of the tree!

once i started gluing down moss and lichen covered sticks to the top of the base, i had more place to attach other items too and it just became a big interwoven puzzle.  working from side to side and back and forth made it easy to see where places needing filling in or covered up.


the beeswax candles are not meant to be burned.  they are just for magical woodland effect!  a while ago i was working on a gnome house project. i had used the tiniest grapevine wreath i could find, smaller than the palm of my hand, and tied ribbon to it to make it hang like a chandelier from the gnome house ceiling.  then i used these beeswax birthday candles to make it look like the tiny wreath had candles sticking up out of it, burned the tips and used the hot wax to secure the candles in the wreath, and voila!, a gnome chandelier was born!


so the little vintage candle clips that are holding these tree topper candles are meant to hold real candles, from back in the day, when folks were brave and daring and put real candles on their tree!
on the tree topper, like i said, they are just for effect.  i am not brave or daring when it comes to combining fire and dead, dry evergreen foliage!


the little vintage glass baubles, balls, pine cones, and sprays are just old odds and ends i find here and there and all are attached with a little dab of hot glue.


there are mushrooms, a bird, a variety of dried plant material, and even millinery supplies tucked in there!


and there is even a stag to face toward the back side in case you can ever get a glimpse back there!

i will keep working on bases and hope to have many made, and for sale, in the shop by next season!  I know, a whole 'nother year from now!  perhaps i will be able to get a few more done but i think most folks already have their trees up and topped for this year!

what's on top of your tree?

making, sewing, designing, and styling,
xoxoxox
jennette


Web Design


i'm a thief.  
i stole some spider webs the other day. 
i remember capturing webs in kindergarten with Mrs. Donahue but i couldn't remember how we did it so i made up my own way.
first i jiggled the web so the spider would scoot away to the edge.
then i used gold spray paint and sprayed both sides of web with it.
after that i placed my paper behind the web,
and started pulling paper toward web back, toward me,
while spraying from the front with spray adhesive.

you could try different colors of spray paint and different colors of paper.  or use blank cards to make stationary.  lots of options.
what will you try?

sewing at Smashing Rubbish World Headquarters and trying to catch up on baby and birthday gifts,
xoxox
jennette


Little Winter & The Ace Hotel

We are back from The Little Winter Handmade Market in Portland.

It was a fantastic Market and a fabulous weekend with the Crafty Aunties and Friends!


We stayed at my favorite, The Ace Hotel.  Every room in the Ace is decorated differently.  Chad and I have never stayed in the same room twice.  Above you can see the movie poster that was in our room this time.  Let me see if I got a good picture of Suze and Anna's room:
It's a bit dark but this is a wall in their room.  Tiffany's room had an owl painted on it with some poetry.  It's fun to see all the various decoration and detail.  I wonder what room we'll have next time?

This is the image on all of the wool blankets covering the beds in The Ace.  You can buy a wool blanket in the lobby, along with t-shirts, stickers, and duffel bags.  There is a hip NW vibe that is carried throughout the entire hotel and it helps define The Ace as a boutique hotel.  Stay here if you ever have the chance!

"The Bad Girls"

Our group included the three of us above: Dianah, Me, and Natasha - all there with no children.  And it included a few friends who had their less than one year old nursing babies with them: Suze, Anna and Tiffany.  Some of us had more freedom to roam, explore, and stay up too late watching live music each night so Anna's husband Greg deemed us, "The Bad Girls!"  Next year I think we will all be in the Bad Girls category, but this year it was Dianah, Natasha and I.  Sweet Katie hung out with the mamas and skipped Bad Girls status for this trip!

Two Bad Girls going to get their PDX on!

This is Tony and Shannon playing at The White Eagle.  We saw them Friday night after a little snafoo in arriving at our intended destination on time!  Thankfully we got to see the end of their set and it was super great!  I love seeing friends rock their skills and talents!  It's awesome!

On Saturday night we saw Y La Bamba open for the Yard Dogs Road Show.  Their sound was beautiful and haunting.  Chad and I had got to see them open for Breathe Owl Breathe at The Woods, the last time we were in Portland, so I was happy to get to see them again.


These two pictures are from The Yard Dogs Road Show!  It was super fun!  The Yard Dogs are a combination of circus sideshow, burlesque, cabaret, vaudevillian, awesomeness!  They were so entertaining again this time and I liked it even better than the first time I saw them with Chad at The Doug Fir Lounge

Now for some Little Winter goodness! 
These little wooden house structures with air plants are by My House Party.  Natasha bought a few of these. 


I couldn't resist and had to buy three prints from Kiki & Polly.  I loved every single one of them but had to narrow it down to three since I bought more art from other vendors too.  I have had my eye on The Night Swim for some time now.  And when I saw the girls pulling their bows back to launch arrows at the target, well, I couldn't resist! 


This print is from Amanda Blake.  I would practically kill or die to have one of her original paintings!  It was SO HARD to choose just one print from her.  I am considering commissioning her to paint a portrait of my boys for their birthdays this year.  Her work is magical, fantastic, and whimsical.  I want every single one of her paintings!
These are the Shanna Murray cups I bought for Chad and I.

And these are the illustrated wall and window decals I bought from her.  The cups are a collaboration with Pigeon Toe Ceramics and they are so sweet.  They have ones that say, "optimist" on the outside with a line half way up on the inside that says "half full."   They have others that say Hello Friend and Welcome Home.  I was so happy to meet Shanna in person.  She is a sweetheart and it was hard to pick just two decals.  I will put the fawn in the Fireball and the You Are My Sunshine one in the front door.  Love her work!


These two cards and cut-out animals are from Oh My Cavalier by Julianna Swaney.  Her artwork is wonderful and again, so hard to choose just one print.  So I bought a few smaller items from her since I had already bought the other prints.  If you have a chance to look up her work, you will be happy you did!


So, needless to say, we had a grand time in Portland.  The Little Winter Handmade Market was phenomenal and The Ace, as usual, was glorious to stay at.  I hope they have Little Winter again next year!  I will be there with bells on and a wad of cash in my pocket!

But I have to say, as grand and glorious as it all was, it didn't come close to being as awesome as the time I spent there with my friends!  Lovely markets, swanky hotels, and delicious foodie food aside, the best best part was being with my friends.  I wish I could organize a trip like this once a month!  I adore each and every one of the amazing women who came along on this adventure with me.  I cherish their friendships, find their individual talents amazing, and am honored they choose me to grow roots with.  They took time from their busy lives as mamas and wives to connect, bond and deepen our relationships.  I love you Suze, Natasha, Dianah, Tiffany, Anna and Katie(and Koa, Nev, and Deva!)!!!  I hope this was the first in many many trips we get to take together!  You are all my sunshines!

xoxox
Jennette 


Map Cradle & Mother Blessing

Finished Baby D's cradle for one of Maurisa's Mother Blessing gifts!

I hosted a Mother Blessing for my dear friend Maurisa on Saturday.  Her son will be born in mid November so it was time to help her prepare.  I found this BIG pine wood cradle at a consignment store after being tipped off by Suze.  When I finally got over to check it out it was marked half off!  Is it tacky to say I only paid $15!  Well, sorry if it is, I just can't help admitting the amazing deal it was!
Knowing what Maurisa and Mike's rebuilt house looks like, I didn't want to leave this as a light pine cradle so at first I thought I was going to stain it with Fiddle head Fern colored stain.  It was a disaster!
It's hard to tell here but the stain just made the cradle look dingy and dirty.  It was streaky and sticky since I didn't sand first(my fault).  But it gave me the excuse to go with the idea I had originally of decoupaging the entire thing with vintage maps.  I had maps left over after covering the wall here, so I figured this was a great way to use them up, spruce up the cradle, and make a unique gift.  Plus, Maurisa and Mike have been world travelers and avid hikers so the country maps and national parks maps made sense.

Here is a process shot.  I did use border paste to adhere the maps to the cradle, just like I did there.  And I started with the bottom, worked my way up the sides to the interior, did the inside ends and left the outside ends for last.  It was easy, meditative, and fun!


I had originally intended to also paste cutout ship pictures on the maps.  After I found a 1960's era National Geographic on ships I was all set.  I cut out a bunch of the images and was all ready but then just felt like the cradle was busy enough as is.  I didn't think it needed more.  It was already perfect!

Here is the bedding that Natasha and I made for the cradle.  I wish I would have gotten a better picture of the awesome vintage kids fabric I found a couple weeks ago that we used for one side the coverlet and for the case for the mattress.  We used organic cotton batting, a layer of felted wool and a layer of puddle pad to insert into the mattress case.  
I have a thing I do for the coverlets at Mother Blessings when I host them.  You make the coverlet and then you "quilt" it by threading wool yarn or ribbon at various points around the coverlet, to hold all the layers together.  You don't tie the yarn right away but rather you leave them untied to do a sweet ritual at the Blessing.  You pass the coverlet around and you speak to a quality you see in yourself that you value and you would wish for the baby to possess.  As you state your aptitude you tie this desire into the quilt with the yarn ends and two square knots.  It's really sweet and is a very nice but simple ritual that lasts and lasts.  I think Maurisa really enjoyed the process and the entire cradle package!
Here is a basket full of the sandalwood candles I sent home with everyone so they could light one when they hear Maurisa is in labor or anytime they want to concentrate spiritual energy her way.  The tag said:

One last part I will share with you is the invite I made for the Blessing.  I made this stamp a while ago and used it to stamp various thin and delicate, almost tissue paper like, plant paper.
Then I glued the delicate papers to plain cards and made an insert for the Blessing info.
Voila!

In other news, I have a ton of crafting and sewing to catch up on!  Working on a "carpet" bag, a coat for myself, and more repurposed leather bags.  Also, I got to eat at The Walrus and The Carpenter in Ballard on Saturday night with Chad, Tony and Daisy and I will hopefully have a Jennette's Restaurant Review for you tomorrow.  All I can say now is, Get there as Soon as you Possibly Can!
And for mine and Chad's anniversary this coming weekend we got a late reservation at Staple and Fancy for Saturday night.  SO EXCITED!  I LOVE FOOD!  GOOD FOOD!  So I will have a review for it next week as well.
The cold/flu bug that's going around these parts is trying desperately to catch me and its getting a hold.  I can feel the aching rundown sore throat thing starting so if I don't post everyday, you'll know why. Garlic and elder have become my soul mates! Wish me luck!

xoxox
Jennette


Vintage Altered Halloween Portraits!

Last year at this time we decorated, altered, embellished and otherwise upcycled these cool old vintage photo portraits we had in the basement.  I had been collecting these for a while and had not taken them down to the antique mall yet.  And I had seen a similar project that inspired me to dig these out and get to work!
This was a family art project.  We got out paper, glue sticks, tape, etc. and our creative juices began to flow!  Forgive me now if these are offensive to you.  Just look away!  But this is my families idea of scary.  Boo!

I can't remember who made which one and most were collaborative anyhow.

Most of the colored paper is applied with just a tiny dab of glue stick so it can be removed later, if need be, and it wont damage the portraits anymore than they already are damaged.

We hang these around the house using big vintage paper clip type holders that are hung on a tack.  Or, I have a handful of vintage clipboards that can hang on a tack while the portrait is clipped to the board.

Freaky Baby!
So, be sure to send me a link of your altered photo portraits if you get inspired to make some yourself!  I'd love to see what creativeness people can come up with!  These would be fun to do at other holidays too, like bunny ears at Ostara. 

Make Art, Create, be Creative!

xoxox
Jennette


Glam Witchy Haunted House!

The Glam Witch, in all her glory!

I had an old dollhouse down at the antique mall that had been there for months.  When I did this big reset of my space last week I decided I was done with it there and I was going to turn it into a haunted house.

Here is a photo of the house as I started to tape off the roof.  I liked the dark gray slate color the roof was so I wanted to preserve it.  Everything else I wanted black!

See.  The lite green and red simply wouldn't do for a haunted house!

I am giving you a view from every angle so you can understand how much this needed to become a haunted house!

First coat of spray paint.

Ah ha!  Haunted house base ready for embellishment!

So I found this little doll down at the antique mall and she was $5.  Her eyes are kinda wild and her hair jet black so I just thought she'd make a great little witch.  I remembered that I had that little cupcake topper jack-o-lantern bucket to hang off her arm and I found a tiny key to hang off the other arm.  She ended up with a hand charm necklace as well.  Lucky girl!
I made her the black hat out of construction paper.  I added glitter trim, a silver star and feathers coming out the top.  She is looking real witchy with her hat on! 
Once I had the silver glitter out, it was all over!  In the sense that I wanted to glitter-fy everything!  So I added glitter trim to the house to give it some bling.

I added cheesecloth behind the windows and then glued in long black feathers.  I added really small details that are hard to capture but I will try to show you.  I had some agate beads that are black birds so I glued them above some of the windows.  There is a bat hanging out in the eves, some spiders on the roof, a skull in a heart and limbs hanging in the windows!


The arm and leg charms are little Milagros from Mexico.  They come in handy as spooky elements.

There just happens to be a lamp on behind the house so it gives the windows a nice glow.


"Why you call me Crazy Eyes?!"

Here is a view of the back.  You can see how it all got painted black, wallpaper and all.  If I don't sell this house soon I am going to be tempted to furnish all the rooms!  Yes, I do have miniature vintage doll furniture.  You know I do!

Watch out!  She'll try to get ya!  She has a bucket full of glitter and she isn't afraid to use it!

So that's the haunted house I have been working on.  Upcycled, recycled, and repurposed.  Good as new!  I put a high price on the whole sh-bang for now because I wish I had the room to keep it and don't want to see it leave so fast but I will likely mark it down by next week if its still there.
Not a lot of sewing in the past few days.  Worked on some baby gift items and have a lot of sewing projects planned but it all comes down to the amount of time I have to sew in one day, people.  There just aren't enough hours!
Off to do some pasting,
xox
Jennette


Altered Clothes - take 2

boring blue cotton dress, thrifted in Tucson, blah, blah, blah

I am not even sure why I bought this dress in the first place.  I guess I thought it would be an easy thing to throw over my swimsuit in the summer, even though I have about a hundred an one little cottony summer dresses like this.  ( just as many as the number of purse/bags now!) 
I was about to give it back to the thrift store in my weekly bag-o-thrift-store-crap-to-drop-off when I thought of putting some little front pockets on it.  I realized that my favorite summer dress have some sort of pockets and that I tend to wear them over and over instead of ones without pockets.  This idea led me to my massive and random stack of embroidered thingies: runners, doilies, hankies, aprons, etc from which to choose a pocket material.  It was becoming hard to choose because I have a ton of mediocre type pieces and I was looking for something outstanding.  Then I hit payday.  See below:
1 of 3, using two for the pockets

Tada!  Birds!  I lurve me some birds, I do, I do!  So I found these three linen doily type pieces that have a bird embroidered on them and and edged with some blue and white crochet/tatting/knitting?  Don't know ,but its lovely.  So I folded each one in half and figured out how to place them for pockets.
close-up of pockets

This will be a little difficult to explain but I pinned the right side of the oval shaped doily down first and sewed it to the dress in a half circle shape.  This created the inside of the pocket, or a pocket lining, of sorts.  Then I folded the top of the oval down, over the bottom half circle, wrong sides together now, to create the lovely pocket with bird you see above.  I just top stitched that down, over the first row  and now I have a lined pocket, no cutting involved, and doily is still in perfect shape in case I decide to ditch the dress, it gets ruined, too small, etc.  Thus I will be able to take the doilies off and reuse them.  Smartyparty!
love, love, love
finished altering
Now i just need to wear it!

Upcycle, rework, and try again!  Dance, dance, dance!  Sing, sing, sing!

Altered Clothes - take 1

thrifted strapless top turned into bag

Hello Y'all!  You will have to excuse me for just a moment while I whine, kvetch, and moan about there not being enough time in each day!!  Where do they go, these days of mine?  Monday, where are you?  You were a flash in the pan!  I actually miss you Monday.  I don't want it to be Tuesday, mostly because it means one day less this week to get "stuff" accomplished.  Oh, Tuesday, come on baby, be my day of massive "doing!"  Maybe I can stop sleeping and get it "all done."  There's an idea.  Why hasn't anyone thought of this before?!  Ha!

OK.  Enough of the complaining.  I have actually been trying to train myself lately to focus on the things I accomplish, instead of the things that are still left to do.  It's hard for me.  Being a first born, Capricorn, perfectionist and all.  But I try.  Thus, one reason I blog, is to document and convince myself that I do actually get some things accomplished!  Look!  I have some photos to prove it!  Now I just have to believe it;  That I do get enough done in one day and that the world will not go to pieces if i don't get one more thing made, one more project sewn, one more meal perfect.  Let it go, let it go, let it go....

So I made a few things!  I did get "something" done!  The above photo is of a pretty little strapless silk top I found thrifting.  It looked so sweet but I NEVER do strapless so I just kept looking at it, trying to figure out what it could become.  When all else fails, make a bag!  Like I really need another, when I have a hundred and one already.  I guess I should really consider selling some of these things!

this is what the original top looked like, bottom edge ruffle and all

In the first photo you can see the silk ribbon I used on the inside to make a drawstring type closure.  I have it hanging over the outside edge so you can see it, but it usually stays on the inside.  Since there was already a ruffle around the bottom edge of the top, I just turned it inside out, tucked in the ruffle, and sewed the bottom of the shirt closed.  Then, around the top, where there was a casing with elastic (to hold up the strapless wonder!), I seam ripped two little holes to thread the silk ribbon thru, and then I tidied up the two holes with a few stitches.  So now I can cinch the silk ribbon on the inside to close up the top of the bag.

close-up of the circle print detail and random sequins

For a strap, as you will see below, I used some left over materials.  I personally like things to look a little deconstructed so I like to use a hodgepodge of materials and textures.  I had some left over grey and dark greenish-blue silk and I had an old top that was batiked with lanterns, moons and stars, so I used a combo of these.  One side of the strap is all the batik and one side is random lengths of the silks, including the button placket from the dark greenish-blue.  May be a little hard to see here....
 
detail of strap

I love the prettiness, lightness, and effervescence of this frilly little bag.  It's not usually my style but for dress up it might be nice.  Its not super hardy and durable so I guess it is meant for once in awhile use.  What are you making, altering, upcycling, or crafting these days?  Do tell! 

Make love, do craft, and carry on! 


Another Monster Sweatshirt


Here are the wool felt monsters i made for Jasper and Rowan, just like Iorek's.


This one is/will be Jasper's

This one is Rowan's

Just like Iorek's, Rowan's Birthday Sweatshirt has his birth year too, 03

Rowan likes his Monster Sweatshirt but I have not been able to catch up with him to get a photo of it on him.  Once I find a plain sweatshirt for Jasper, I will finish his and then I will try to get a photo of all three boys in their sweatshirts, together.  Seeing all three, almost finished, made a few of us in our craft group want to make some for ourselves.  Not monsters though....... What should we have?  Whatever it is, I doubt we will be adding our birth years to ours!  Maybe we will come up with a name for this craft group and then we can have it opposite our emblem!  Ha! 
The most likely name for our craft group right now would fall along the lines of : Crafty Wine Swillin' Mamas, or, Mamas Craft and Stitch and Bitch, or, Eat, Drink, & Craft Mamas!

Sew, Stitch, and Mend.  Make, Create, and Imagine.  Smile and Dance.  Do what you Love!


Iorek's Birthday Sweatshirt

Iorek's almost finished Birthday Sweatshirt!

Iorek got a black zip up hoody too for his birthday back in April.  His mom, Dianah, just got one for hers too!  Unlike Di's, Ioreks is all hand sewn.  There were so many little tiny pieces that I figured hand sewing would be easiest and it was.  It went super fast once I had all the details cut out.

Work in progress.

I started with a letterpress card that Jasper got for his birthday.  It inspired me to see if I could somewhat duplicate the design idea onto fabric.  This is what I came up with and I am pleased. 

Face details all hand sewn on.

You can see above that I toyed with many ideas about how to do the little details.  I ended up going with non black horns to get more contrast.  Again here, I used wool felt.  Always have, always will.  When it gets washed in hot soapy water it will just all the more bind together and be well held and bound.

Face hand sewn to "mane."

I cut out the mane after I had the face sewn on.  For some reason this made it easier for me.  I guess I forgot to keep taking pictures of the end of the process but you can see by the finished photos of Iorek in his sweatshirt what it turned out like.

Mane hand sewn to horns.

I debated about adding feet.  Something similar to the hands/claws.  In the end I didn't do feet/claws and I like it.  Kinda like he's a monster in his jammies!


"I can make you smile!"

The only thing about hand sewing is that you just gotta be ready to switch colors a lot.  I wanted to match most of my thread to the felt color but you could do a contrast thread color and use it on all of the felt.  If you just get a bunch of needles threaded to begin with then it doesn't seem so daunting to stop and thread a new color each time you need it.

Ready to run the Top Pot Donuts Kids 1K!

The 03 has two functions.  It mimics the sporty gear we see all over the place now so it makes it a bit trendy, if I do dare say so myself.  And, it is Iorek and Jasper and our friend Rowan's birth year.  I am working on Jasper and Rowan's sweatshirts now.  They will be "monsters" too, similar, but different, and all with the 03 on the other side.  They plan to be a little gang of seven year old monsters!  They already are that gang, little monsters, but now they have uniforms!


Jasper and Iorek cracking up.

I adore these two kiddos.  This is how they are when they are together.  Laughing, giggling, smiling, bossing, singing, making music, doing magic shows, investigating, exploring, reading, explaining, spazzing, tumbling, negotiating, bickering, loving and still laughing.  We adore you Iorek!  Thanks for being Jasper's good, good, buddy!  You are an official 7 year old monster gang member!  Congratulations!

Rib Cage Love


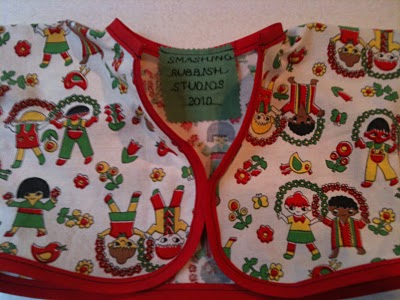
Dianah's rib cage sweatshirt

Way back in January, I guess it was, according to Dianah, she herself told me about this great sweatshirt she had seen in a local shop here in Seattle.  She wanted it SO BAD but couldn't afford the over $100 price tag.  Of course we LOVE to support our local hand-makers but there just wasn't room in her budget for a new $100 plus sweatshirt. 

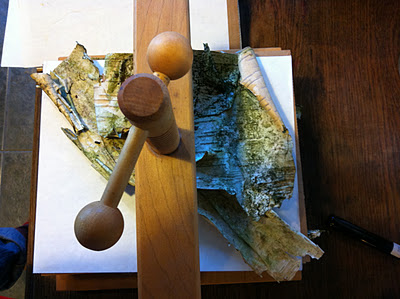
enlarged stencil found on Internet

So she is telling me about it, on and on, I love it, I love it, I love it, and I am just thinking, the whole time, I will just make you one for your birthday.  How hard could it be?  I did finally, a few months later, make my way to see THE actual sweatshirt and low and behold, I KNEW I could duplicate it, make something very similar, but with my little touches and have it be close enough that it would still be the sweatshirt Di had been coveting.  Also, it wouldn't cost me nearly $100 to make!

stencil cut out and layed out

So as Dianah's birthday was approaching I was making my way toward the final design and implementation of said design onto a great, almost new, but totally second hand, thrifted black zip-up hoody sweatshirt.  The sweatshirt was the only one little tricky piece to this operation.  I knew if I looked long and hard enough I could find a great one used and not have to buy a brand new one.  It was just a matter of staying on the hunt!  The sweatshirt was located at one of the many fantastic thrift stores in Tucson, Arizona!  When we were there in April I still hadn't found the ideal zip hoody but since I was thrifting my toosh off every day I finally scored the perfect one!

some wool felt pieces cut out and layed out

  In the photos you will see some the steps it took me to get to the final stage: Di loving it and wearing it every. single. day.  Once I had it finished and could see for myself how well it turned out, I just could not wait to give it to her.  It was killing me to not talk about it to her and just give it to her as soon as I was done.  When she did finally open her gift I was jumping up and down like a child and clapping my hands!  What a goof ball!  But it was perfect because we were having a fire in our "tiny" backyard pit and she was cold and needed a hoody to be warm so I tore into the house, grabbed the gift bag, and shoved it in her hands.  "Open, open, open," I demanded!  She was thrilled!  Smiles all around!

pinning in progress

So besides locating the sweatshirt, I had a few other items to attend to.  I had to find a stencil to suit me.  Also, I knew I was adding the little hear under the ribs because that was big part of what Di liked about the original hoody, but thankfully I know how to make hearts so that was an easy step!  The search online for rib cage stencils didn't take long and I was able to enlarge it on my printer/scanner to get the size I wanted.  I only needed to cut out one side of the cage to make the entire thing because each side was the exact same.  Go figure!  The sternum part was a big guessing game because I could not remember if the "original" had one but after much debate between Chad and I, we both decided it looked cool, splitting the one in the stencil, down the middle, and having the zipper go up through the middle of it. 

 
close up of pinning. 

I didn't have any white wool felt on hand so I got that at Ben Franklin.  I got the red there too but a few months back when I was working on Iorek's birthday sweatshirt.  Iorek is Dianah's son and Jasper's real good friend.  I will do a post of his sweatshirt soon!  Anyhow, besides the felt I just needed a million tons of pins!  Some of you know that when I sew, I usually don't use pins at all, or very little.  But for a project like this, you will lose your mind if you try to go pinless!  I knew for best results I would need to pin the heck out of it, get lots of pokes, and I would end up with the perfect finished product! 


the entire thing PINNED!

So then it was time to sew!  I just picked a place and started!  What else can you do?!  I just made sure my sewing machine was loaded with good white thread and began.  As I got one rib done, I would take the pins out and cut the loose threads so I could begin to see what it would look like.  I got into a rhythm and just blissed out on it.  Zen sewing, if you will.  It is thrilling to have a project come together so easily and be able to see your progress so quickly.  It empowers you.  I felt like Super Sewer Girl Super Hero with no seam ripping being my Super Power!

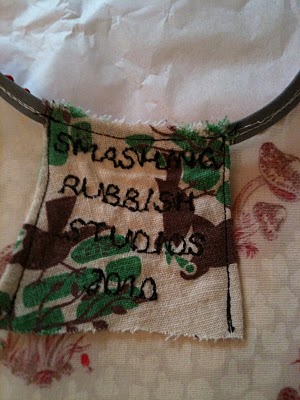
almost finished!  label applied.  heart hand sewing left to do.

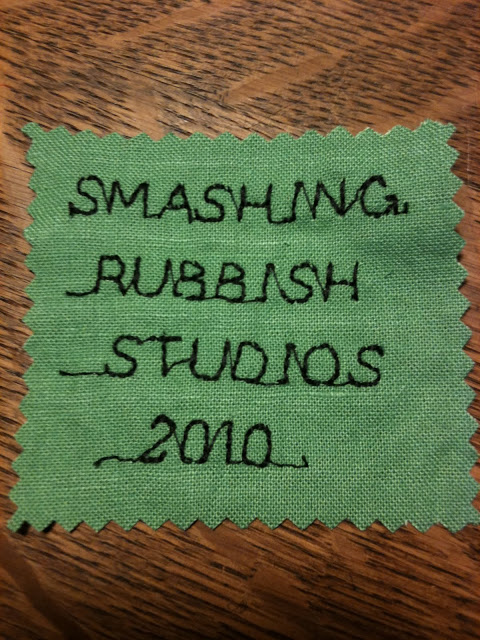
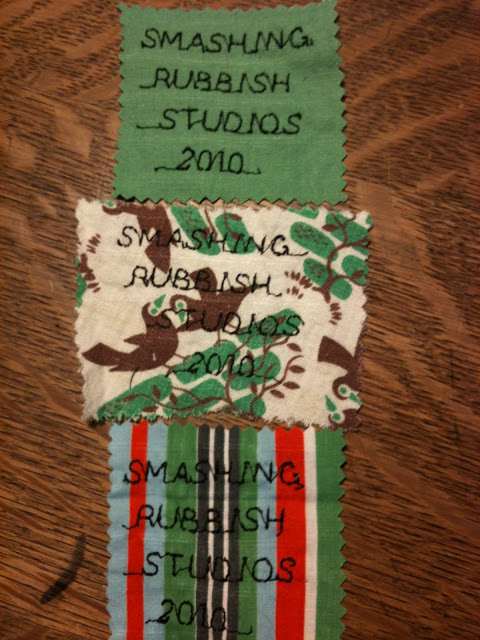
I did finish with inserting one of my own home made labels.  And I knew I was going to finish the heart by hand sewing the edges, in between the ribs.  Once that was all done, it was ready to go.  I was so excited by how it turned out!  Very pleased!


close up of hand stitching on heart.

You can see the machine stitching on the ribs in the picture above.  Some places I got too close to the edge and didn't want to chance it not being well attached so I just went back over those spots and restitched inside, more on the rib.  I did not seam rip the original stitching, in those cases, I just left them double stitched and I really like how it gives it more character and makes it look really handmade. 
And oh,  I always use wool felt too, never acrylic.  Not only is the wool natural fiber and much preferred, it will also begin to bind to the sweatshirt each time it is washed.  Oh the wonder of wool!


Dianah in her sweatshirt!!!

Make a gift, give it with love, and be happy!

Create, Upcycle, Reuse, and Make!


Succulent Chair

Yes, Folks!  This is a sedum chair!  And No, you can't sit on it!


I thought I would just keep sharing the things I upcycle or repurpose or deconstruct or reconstruct so you can see what kind of silly ideas I have!

Chair with mesh screen applied.

 Some of you know that I have a space at M & M Antiques in Monroe, Washington.  I rent a space to sell all crazy stuff I collect and I don't have to be there to sell it.  Oh, the beauty of it!  Anyways, those of you who do know me, know that I am a total collector, borderline hoarder, and that when you come to my house you rarely see the same thing twice.  Well, not really, but I do like to live with things for a while, see how they feel, and then recycle them thru my space at M & M when I am ready for them to find their next homes!  You all probably know that this is kinda my business.  I buy items at estate, rummage, yard, garage, tag sales and auctions, flea markets, thrift stores, and other antique stores and then I resell them.  Often, I buy things I love and want, and then when I feel I can let go of them, I sell them at the mall.  And often, I deconstruct, reconstruct or upcycle something, like this half broken chair, into something new and fabulous and then sell it.  I certainly don't make a ton of money doing this but I get to be creative and it also earns me just enough dough to spend the next month, to buy more cool junk!

Close up of seat with wire.  Just used a staple gun to adhere mesh to bottom of chair.

 I found this chair at "my" antique mall.  Melanie and Mildred are really the owners but I will say "my" here and in future posts because I am often talking about several places at once and this is just easier.  So, at my mall, the other day, here was this seatless chair, sitting outside the door, for sale, for beans.  Beans, I tell ya.  And before I even knew how cheap it was, I knew what I was doing with it.  Onward Ho with the sedum/succulent obsession!  One of the uber spectacular or seriously dangerous, depending on how you look at it, things about being a vendor at M & M is that they let us "dealer charge" anything we want.  What this means is that when I want something in the store, I just say "Dealer Charge" and the money comes out of my next months check.  See.  Uber spectacular and seriously dangerous!  I have to be careful to make sure I actually do get a check at the end of each month!  But the great thing is that you don't have to have cash up front to take what you want.  So far it has served me well, to be able to dealer charge, and I have been able to bring home some fabulous finds that I would not have been able to otherwise.

I used Gutter Guard!  I got a few rolls of this at a tag sale for about $1.  I got all they had since I envisioned it as the perfect material for this type of project.  I cut it with old dull scissors and didn't have to use wire snips.  It's not nearly as "pokey" as chicken wire.

The next garden patio project I am working on is the succulent table.  I can't wait to show you the finished product!  I found a perfect metal frame a the end of last summer and knew it was the perfect thing for this specific project I had in mind.  It has some wicker around the edges of it.... kinda hard to explain but I will have plenty of pictures for that post! 


Here is the chair, AFTER Spanish moss was layed down, when the soil was added to prepare for the sedums.  This is a fine layer of moss with a fine layer of soil added on top.  It doesn't take much and since you can fertilize it with your organic fish fertilizer throughout the season, you can get away with a small amount of soil.


After I had the chair prepped to this point, I just started going around to all the various patches of sedums and succulents in my gardens and teasing out bits and pieces here and there.  I gathered several kinds, types and colors and brought them to the chair and began laying them out.  Remember, sedums have pretty shallow root systems so I just do the "laying on" method where you just kind tuck the sedums in where you want them to be.  I arranged the seat for variation in color and texture and then gave it a little sprinkle of soil around and in between them to fill in little spaces.  Then I finished with a good watering of organic liquid fish fertilizer water and Voila!  A gorgeous little planter if I do say so myself!


Hope you readers are thinking about what you have to plant with sedums!  The possibilities are endless! 

Plant what you love, dig in the earth, imagine beauty in the disgarded and ordinary!

New Labels and Baby Gifts

An example of my new homemade labels!

Hello and happy Tuesday!  I have several posts I am working on editing and here is a short fast one for ya! 

Last week, I think it was Monday or Tuesday, I stayed in my pajamas all day long.  I wasn't feeling top notch and I figured instead of laying in front of the boob tube and watching Fuel TV all day, I would get to work on my already-should-have-been-done atelier labels for all the fun stuff I have been making.  I am not certain that this is the final design but I like what I am seeing so far.  My new sewing machine, the one the boys got me for my Winter Solstice/Christmas gift, has over 80 built in stitches and 120 stitch functions!  woot woot!  It's not anything too primo or over the top but it works just fine for I do right now AND it has the entire alphabet! 
Anywho, since winter I have been meaning and intending to make these labels so I would have a way of marking my territory, so to speak.  Now when I sell an item I have made or when I gift a handmade item to a friend, its orgins will never be unknown!  My handmade goods will go out into the world with a way to be identified and it also adds a tinge of charm.  Here are some of the other examples:
  These are the three types of vintage fabrics I used this time.  Different fabrics next time!

The plan for my next batch of labels will be to make several that are very long, each word after the next, so I can sew them up the sides of inside seems or along edges.  Sometimes your product doesn't allow for a big "inside" label and I will show you what I mean next.  Also, I will be trying to sew the words onto twill tape and I will let y'all know if I have success with that later.  Here is one example, of an item I have been making, that could use a long narrow label, instead of a big fat chunky one.  Warning to all of my pregnant and expectant momma friends- close your eyes if you want some of your Mother Blessing gifts to be a surprise! 

Reversible bibs in vintage fabrics!
See, a bib would benefit from having a long skinny label sewn up one side.

The other way I have been using my labels is like this:


On vintage fabric baby jackets!


Another


This little jacket should fit up to a three month old, easily, although it looks tiny here.

Close up of label inside baby jacket.

The baby jacket is not my own pattern although now that I have worked with it a bit I am considering drafting my own version.  I am thinking more of a kimono style with ties that wrap around to the front....
This patter is from the book One Yard Wonders by Rebecca Yaker, in the section Outfit your Small Wonder, and the pattern was designed by Anna Buchholz.  The bib pattern is also from this book and although I do not have the designer information for this particular one, it is a very universal pattern and you could find it practically anywhere.  I have made or am in the process of making several items from this book and I would highly recommend it to any sewers out there who: A. are short on time but love to sew, B. who have a buttload of fabric laying around and no idea of what to do with it, C. like to make gifts and are fresh out of ideas!  I have made the kids messenger bag for Jasper and am currently working on the folklore bag for myself using some amazing burnt orange/brownish leather I got from the thrift store and whose past life was as an awesome 1970s Taiwanese trench coat!

Sew your hearts out, label what you make, and do what makes you happy!

Down where the Sasquatch hide....

Beauty of a day!  A seven year old birthday party.  Rain.  Sun.  Ahhhh, the Northwest.  Just missing a Sasquatch sighting..... Ha! 

I have been wanting to show y'all these lovely badges I made for my Juji (Julie for her 40th!) and for Jasper (for his 7th!).  So so easy yet quite a statement!  Here are some photos below.  I wish I knew how to do a little tutorial for you in case you want to make yourself a badge.  I will try to explain below.  It is really, soooo easy!
Julie's Birthday Badge!

Jasper's 7th Birthday badge!

The back of Julie's badge.

Front and back of Jasper's.

I was able to purchase several of these green rimmed milk bottle caps from the Queen of Tarte last time she was in town.  She was doing a show in Bothell and there was not a lot to drool over from other vendors but Q.O.T. had these and Kathy and I were drawn to them.  Numbers were already printed on them, just like Jasper's 7, and I instantly had the idea for his birthday badge.  The one I made for Julie has a number under it too but I had to cover it since none of the numbers were 40! 

The first thing I did was take some of my many rolls of crepe paper and started pinching and gathering them and just hand forming them into a circle shape until it looked ruffley.  Then I started on the next color or row, and so on.  Once I had what I wanted, I just used white glue to begin adhering the crimped, ruffled, pinched, circular shaped crepe "wreaths" to the back of the bottle cap.  I just overlapped the crepe where it met in a circle shape.  The caps are a kind of waxy, papery like thing but the white glue seemed to work to adhere it all together. 

Then I had to decide what kind of ribbons I wanted hanging down from the badge.  I have a massive collection of ribbon, vintage and new.  I also have a ton of seam binding, edging, ric rac, etc.  The green "ribbons" I used here are actually like hem tape that you might use to cover a hem on the inside of a garment.  Its cotton and very stretchy and I have several rolls of it so this was a good way to use some up.  I just decided on how I wanted to layer them and then trimmed the ends to make points.  You make the points by folding the ribbon in half length wise and then cut a 'V' shape from the fold to the outer edge.  You can make the points as long or as blunt as you like, depending on how long your 'V' is.  Once I have my layers of dangling ribbon situated, I glue them all at the same time and together, to the back of the ruffley crepe lined bottle cap, on the back.  You can make them hang straight down or flare them at a slight angle.  You could also just do one strand of ribbons or several strands! 

To cover up all the glue, ribbon ends and crepe circles on the back of the badge, I cut out a nice little circle of wool felt, with my pinking shears so it has a 'ruffley' edge too, and glue it on the back.  BEFORE I glue it on though, I hand sew a pin to the felt so I have a way to attach it to my clothes or wherever once its all dry and ready to wear.  I have several leftover early entry badges from The Sandpoint Design and Antique Market so I just detached the safety pin part from the plastic and used the pin to sew to the felt.  There are several types of pin backs at the craft store so you just have to choose what works best for you.  Once the pin is attached to the felt, THEN I glue it to the badge back.  Voila!  You are pretty much done!  You just have to wait for the glue to dry and then wear your badge or give it away!

Here is my sweet Julie with her Birthday badge:

Here is tired Jasper, on his birthday, after horseback riding in the desert, but still wearing his Birthday badge:

Oh!  I almost forgot to mention!  Look at this close up of Julie's badge.  You will notice the background behind the 40.  I used the inside of a Yogi tea box!
I did this specifically for Julie because it reminded me of the amazing henna work she does.  I am tellin' ya, this woman is a master!  Getting a henna blessing from Julie is one of my most favorite things to do when we are together.  It is amazing art that stays with me for days and slowly fades as the time since our last meeting grows.  I need to scan the photos I have of Julie's henna work and do another whole post just on that!  The 40 is just stick on numbers that I glued down and sprayed matte varnish over to help hold them on.

Here's to art, craft, milk caps and crepe paper!
Go make art!