Metallic Gold Leather Bag & Pouches


here is the metallic gold leather bag i made from an upcycled and repurposed metallic gold leather skirt i found in nashville!


this photo makes it look more silver but it really is gold.


here is the back side and showing you the attached lining that i took out.

here i am just seam ripping, and seam ripping and seam ripping


here is the skirt inside out, no lining, and waistband detached


and here is another photo of the finished bag!

i made it with short handles, reusing the waistband, so it can hang off my arm or over my shoulder

it's lined with two different vintage fabrics and has a huge inside pocket

i like how in some light it looks more gold or less gold, but always metallic! i'm going to use it for a while. yeah, a new bag for me!

with some of the left over pieces i was able to make a few small zipper pouches!


one has a red zipper and one has a green zipper

both have the same vintage fabric lining shown here and both are for sale!

these would make adorable gifts!

get them while they last!

sewing, sewing, sewing,
xoxoxo
jennette


Natasha's Bag and Badge!

This is the bag/sling/tote I made for my girl Natasha, for her Birthday!  Happy Birthday Sweetiepie!

You might recognize this awesome orangey-brown leather from this past project:

Yes!  This was a leather trench coat!  You might remember that I cut out the middle part and made myself a leather and blue velvet bag, retaining the belt loops and button front.  I still had the top half and bottom half left over so I made Natasha's bag using up the bottom half.

I used the same vintage army canvas I gushed about using for my own bag.  And I also used a tweaked version of the same pattern as well.

This is the lining and small inside pocket of the bag.  I used a vintage mushroom fabric.  I ran out of "tree wood grain" fabric so the mushrooms were the next best thing.
(Yesterday I did manage to procure 5+ more yards of the wood grain fabric for future projects.  Thanks Mom!!)

A peek inside the finished bag.

Here is Natasha opening the box that had her bag in it.  See the, "What the heck is in here?" look.  She had no idea I was picking her up to go have dinner with our friends.  She got a few surprises this night!

She looked happy when she realized there was a leather bag in there for her!  I didn't get any photos of her holding it but she seemed to like it. 

Did you notice her Birthday Badge in the photos above?  Here is a better view:

And a close-up:
"It's My Birthday & this is My Party!"

Once again I used a vintage milk cap to form the base of the badge, just like I did here.  I scrunched the crepe paper into a ruffled circle and glued it to the back of the milk cap, added "ribbon" to hang down, sewed a nice pin to a piece of felt and then glued the felt to the back to make it a badge.
You could make a birthday badge out of almost anything.
They are fun and festive and necessary so
make some!

Work continues in the Smashing Rubbish Studios!
I have a few more bags in the works, some different styles,one "carpet bag" made from a vintage rug remnant, and more made from oil paintings.

Working on a "Haunted House,"
xox
Jennette


Best. Bag. Ever.

Well.  I did it again.  I made another bag/sling/purse/tote bag.
And I am freakin in love with it!
You gotta see this.
Look what it started out as:

Yep.  A rich dark chocolate buttery leather mini skirt!
Apparently a size 6 is enough leather to make this bag.

Used my own version of this pattern, based off of this pattern, but with some changes.  Like for instance, I left out the pleats and did not use fusible fleece interfacing on this leather sling.

This is the vintage fabric I used for the inside pockets.  I LOVE it because it has birds, acorns, fish, pyramids, mushrooms and pears!  It's perfectly odd!

I used this amazing wood grain fabric that I found at the Woven Threads quilt shop in Chelan for the lining.  I LOVE this fabric too.  I am going to buy the rest of the bolt and see if my mama will bring it over with her next time she visits.

Here is one side of the soon to be bag.  Notice the seam down the middle.  That's the side seam of the skirt.  And see the crease/fold across the bottom.  That's the bottom hem pulled open. 
Apparently the people who make leather garments use all manner of binding, edging, hem stuff to make the leather behave and act like they want.  I should have taken a photo of all the deitris that came out of the folds and seams of this skirt.  After taking out its lining and pulling apart the seams, the leather was still strong but thin enough to give my sewing machine no complaints.  That's a good thing!

Here is one side with the vintage army canvas band attached.  I am having a major crush lately on vintage army canvas.  I love the earthy hues.  It comes in varying greens and browns.  It's getting harder to find. 

And I am using it to make love, not war!

I happened to find a sleeping bag cover, at a tag sale three weeks ago, for $3!!!  MAJOR SCORE! 
I am on the hunt and look out for more so if anyone out there has any good resources they care to share, please fill me in!
Its durability, texture and color make me happy!

This is the large pocket attached to the lining.  It has a seam running down the center to make two compartments.  And it turns out my stainless steel water bottle fits perfectly on one side while my sunglasses/lip balm case fits perfectly in the other!

Here's another shot of the finished bag.  One thing I like about this bag is that it doesn't really need a closure piece on it.  It doesn't call for a button, zipper or snap.  Because of the handle design, wide at the bottom and thinner on the shoulder,its not easy for anyone but the wearer to get into.  And it wont gap open dramatically, or least you can fold it over, if you have to take it off out in public.
I say best. bag. ever. because I love it so much for me.  It turned out exactly as I envisioned and I plan to wear the heck out of it!  And too, I have actually had several very kind friends and people say they like it too.  And some of them have even asked me to make one for them to buy.  And that is so flattering and sweet and makes me smile.  Since this is not an open source pattern I need to find a similar one that is so I can make them to sell.  Since I set up an Etsy shop I haven't even had time to make, list, sell or ship a single item yet.  Its coming though.  Coming soon.  I can feel it in my bones!
Me + My Bag = True Love

xox
Jennette


Altered Clothes - take 3, aka Leather Binge

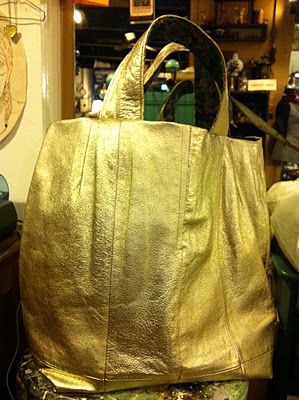
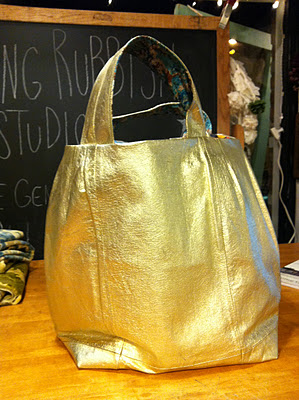
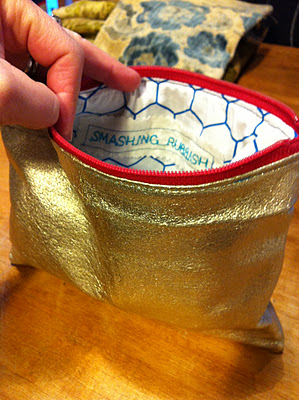
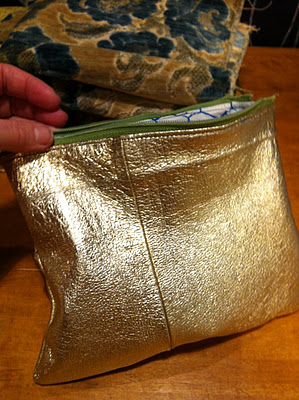
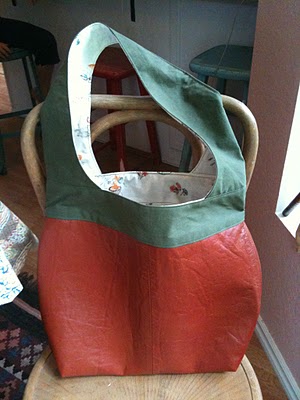
FINALLY finished this leather bag I have been working on forever!  I really like how it turned out and what makes it even ten times cooler is that it is a complete and total upcycle/repurpose project!!  Uh huh!

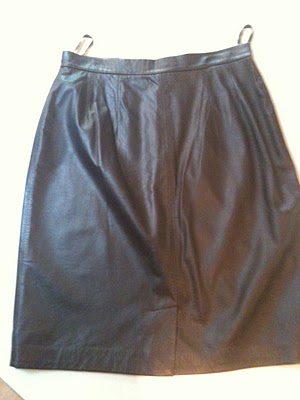
Here's the dealio.  It was a full size Taiwanese leather trench coat.  I LOVED the color of it at the thrift store but I didn't love the price.   I asked the manager if she could do better on the price and to my utter amazement, she could!  I was actually shocked because it was Goodwill and I have begun to think of them as big corporate mucky muck and I think they usually cost too much.  I am so used to asking for the "best deal," or "is this your best price," or "can you do any better," from all the junkin' I do at yard, flea, estate, rummage sales so it just came out. And she said yes.  And she said how about $10?  Well, I gotta say, I still hesitated since I can find good leather to reuse at all these other types of sales and I never pay more than $5.  I didn't balk long though since I LOVED the color and an idea was starting to formulate.
  
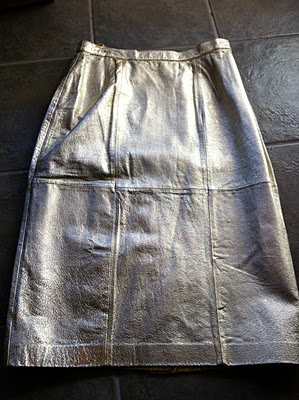
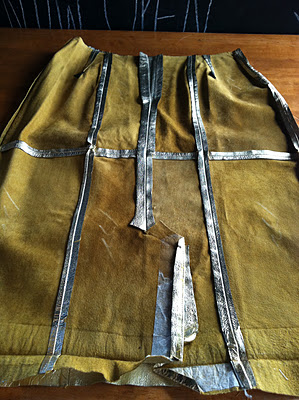
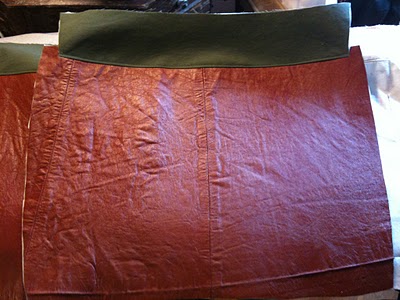
Unfortunately, my photos of the intact and original trench are on the old computer that died but I was able to give you a general idea of what the thing looked like before.  Wow, right?!  I was able to cut out the mid section of the coat, on the seams, and still have the rest to do more projects with. 

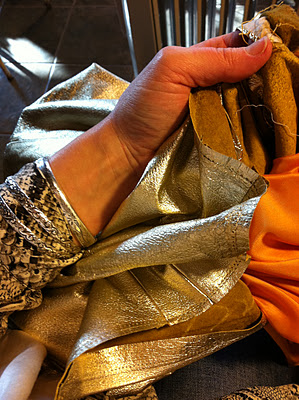
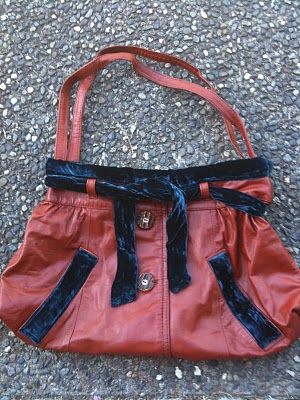
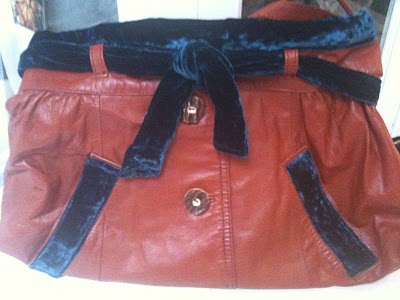
I took off the plastic buttons, even though they were cool (saved em, of course), and hand sewed on two antler buttons that I had.  Then I used my machine, which didn't like any of this sewing leather business, to sew the front panel, next to the buttons, closed.

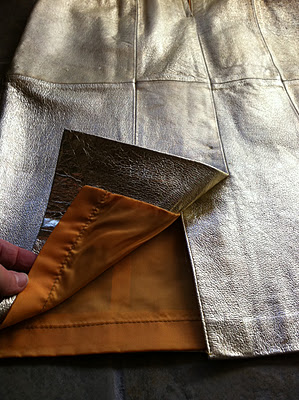
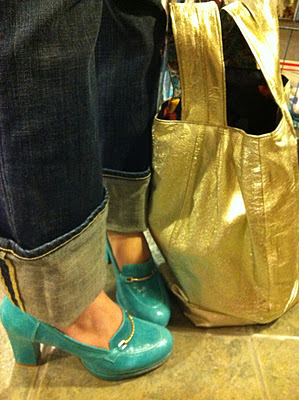
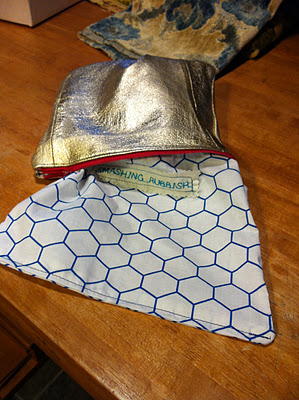
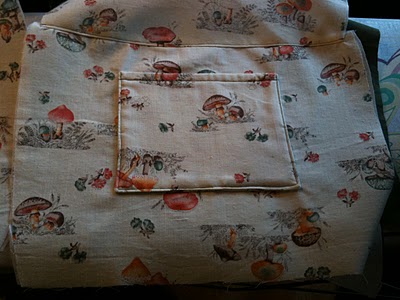
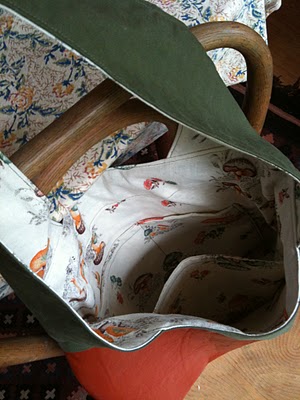
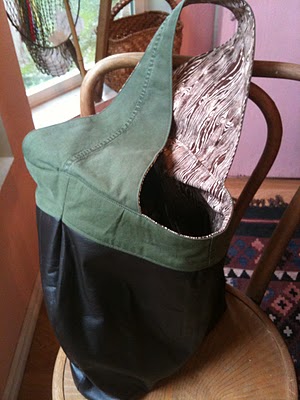
I had some left over deep blue velvet from a wrap around skirt I made myself last winter.  I really like the contrast of the blue velvet and orangey color of the leather.  This bag has a wintery feel to it but I am trying it out for a few days now!  I used the velvet to patch over the pocket openings, line the top edge and as the "belt!"  See the original belt loops, still in place?  The velvet belt slides right thru and cinches the bag closed if need be.  I think I should still add a magnetic snap. 

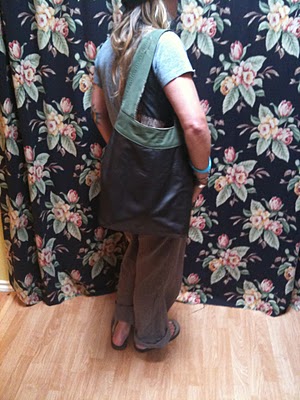
My machine was so unhappy about sewing leather.  Even though this isn't thick, once you add a layer of velvet, or dare to sew two layers of leather together, she gets pissed!  I went thru a whole package of leather needles and in the end I had to heed my lovely friend Suze's suggestion and take it to a shoe repair place to finish the last step of attaching the shoulder strap.  Thank goodness I did, since now its finished and I can actually use it, kinda the point of making it in the first palce!

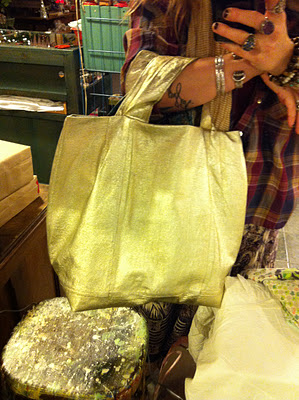
I took it to Woodinville Shoe Repair and for $10 (I know, It ups my overall cost and defeats the purpose of bickering over the price in the first place, but it was so nice to just GET IT DONE!), they sewed my straps on for me.  Thank you shoe repair guy!  I think my friends Katie and Dianah both have kick-ass machines that would have don't the job so I will try that next time.  This time i got too impatient!
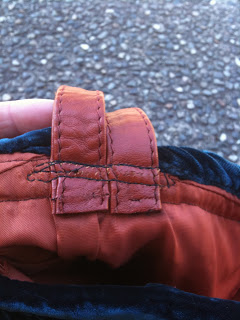
The shoulder strap is made from the original belt.  It was a thin belt so I just cut it in half, liked that length, and had him sew each piece on, side by side.
Here is the very simple but heavy duty sewing that was done at the shoe repair place.
 
Overall I am very pleased with how this turned out but I am not happy my sewing machine is such a wus.  I think I will have to trade up because I have A LOT of leather projects in mind.  Mostly bags and purses but also saddle bags for my vintage Schwinn, sword and knife sheaths for J. and various gifts and whatnots for friends and family.  I will let y'all know when I have some pieces up for sale :)

So, Sew, Sow!

Dishwasher broken so off to handwash dishes, Jennette